How to do a Long Tail Cast-On
The long tail cast-on is the most popular cast-on and the most recommended for beginner knitters. It creates a firm and elastic edge. It is the first cast-on I ever learned and the one I always use if a specific cast-on is not called for in the pattern. It is very versatile and works really well when knitting garter stitch (knit every row), stockinette stitch (knit on the front and purled on the back). If you are casting on to do a rib stitch (alternating knit and purl stitches to make a ribbed fabric that has elasticity), there is a cast on similar to the long tail cast on that would be more suitable. It is called the twisted German cast on. The long tail cast-on looks good on both the front and the back so it is an excellent choice for the beginner knitter or most projects.
The most common mistake that is made when casting on is that the cast-on can be too tight. When casting on you want the stitches snug and not loose around the needle. However, when I use the word snug, I don’t mean tight or firm. I mean just touching the needle. If you find yourself casting on too tightly, I have a couple of tips for you; you can use a needle one or two sizes larger when casting on. Just be sure that the correct needle size is used when beginning the project. Another way I find helpful is to hold a smaller needle alongside my working needle. For example, if using a size seven needle for casting on, hold a size four needle with it so that when the smaller needle is removed you have some extra space between the yarn and the working needle.
I will demonstrate how to perform a long tail cast on:
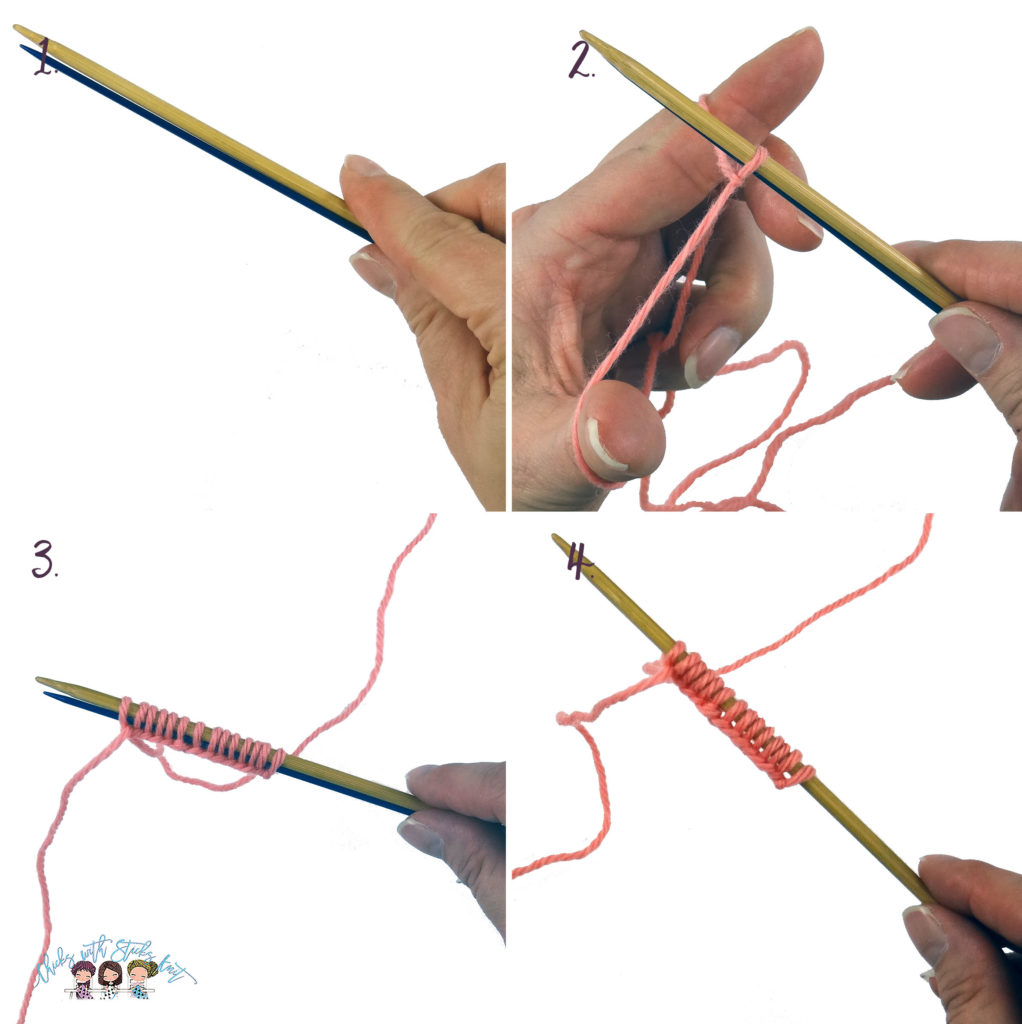
Step 1: Leaving a long tail, make a slip knot and place it on the needle. The tail should be hanging down the front of the needle and the working yarn, attached to the ball, hanging down the back

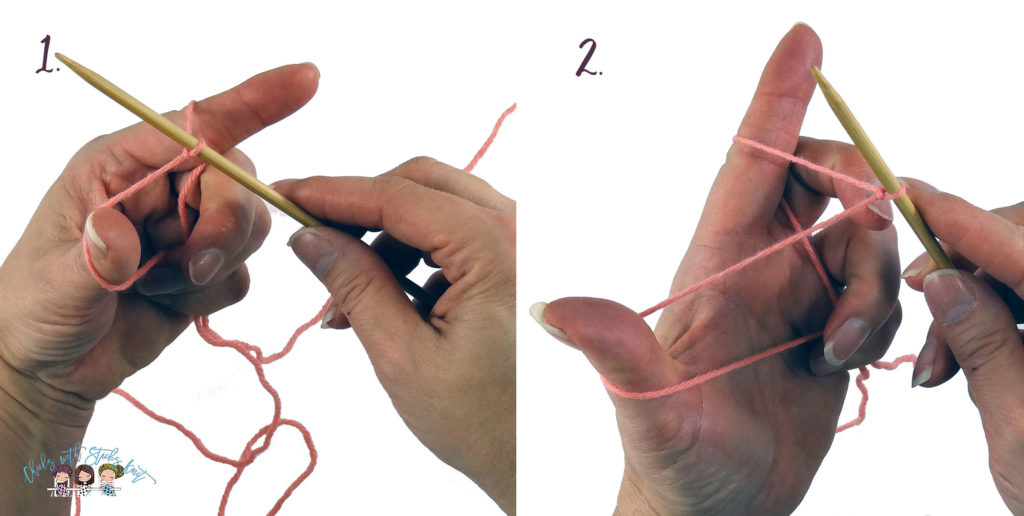
Step 2: Hold the needle in your right hand and use your left hand to create a sling shot with the yarn by placing the tail of the yarn over your thumb and the working yarn over your index finger.
Step 3: Pull your left hand down as if pulling the sling shot to put some tension on the yarn. I hold the two tails in my pinky finger to keep them taut. Some people like to hold the two tails with all of their remaining three fingers.
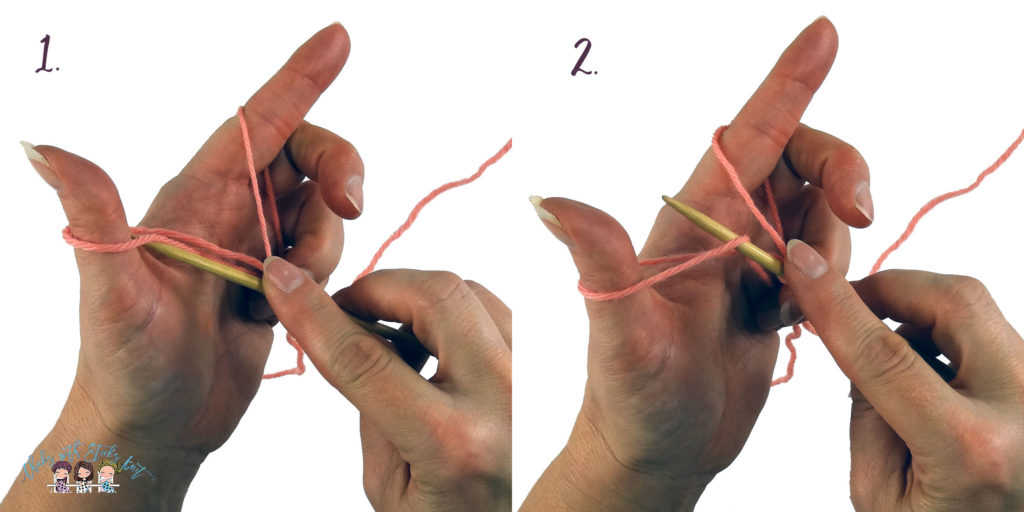
Step 4: Using the knitting needle, catch the yarn around the thumb by going under and into the loop on the thumb.
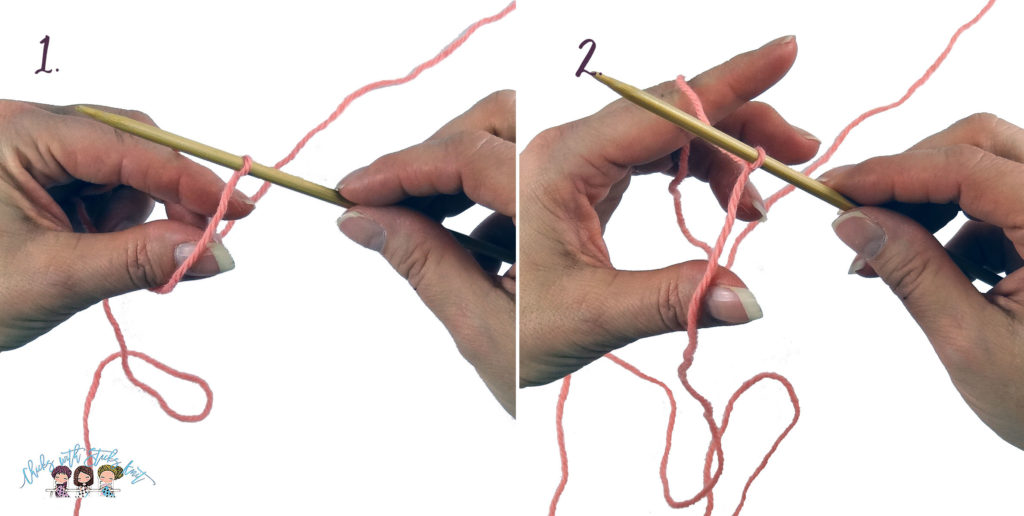
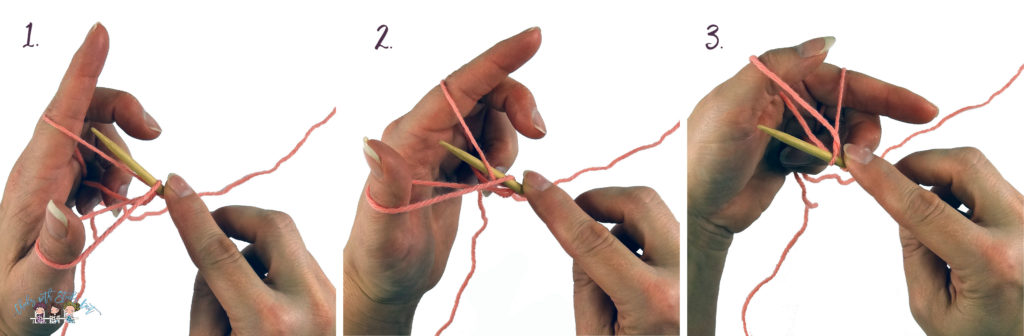
Step 5: Scoop the yarn on the index finger by going over then under it and bring that loop through the thumb loop.
Step 6: Drop the loop of yarn off the thumb and pull the two tails to tighten the yarn on the needle (not too tight just snug).
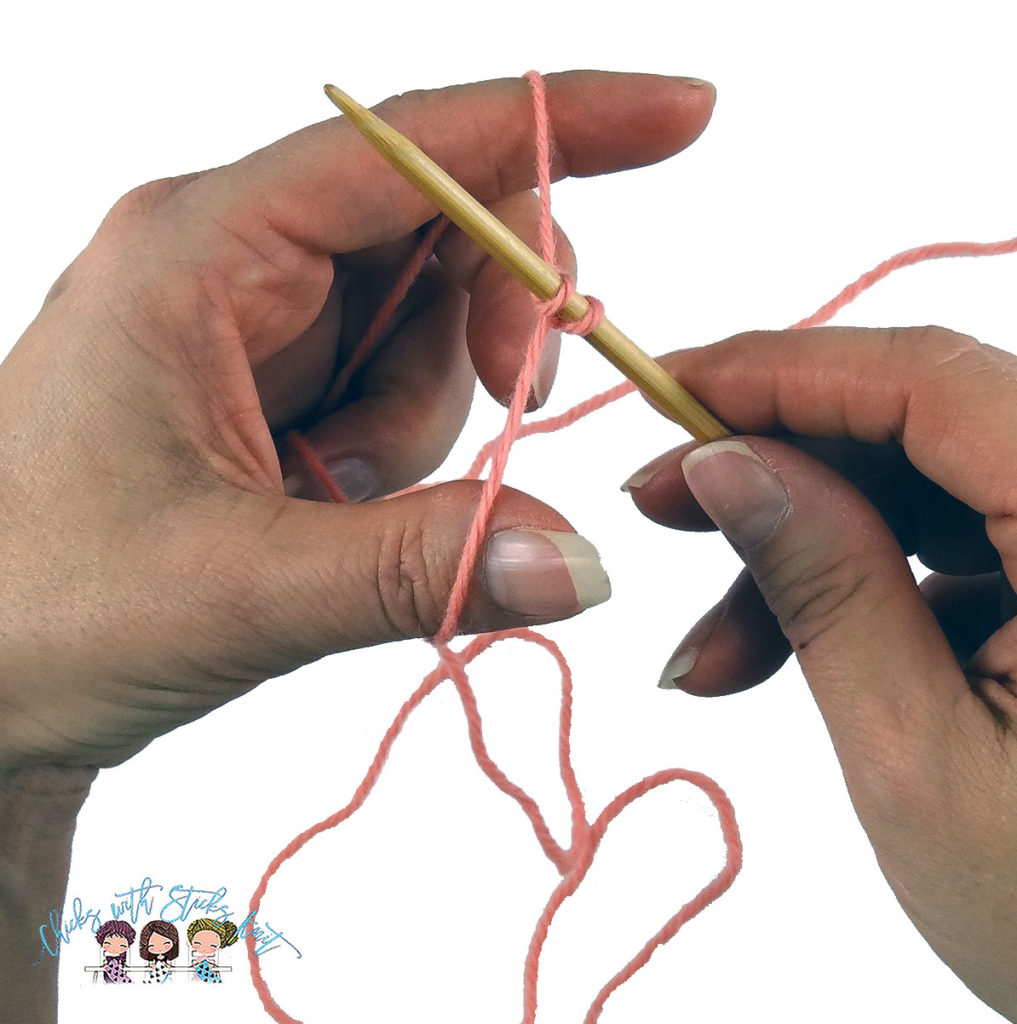
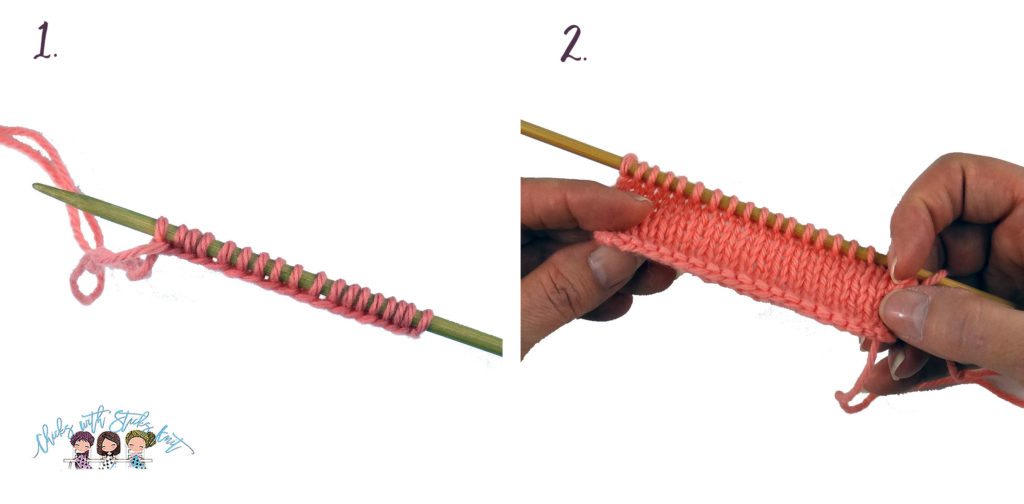
Repeat steps 2-6 until the desired number of stitches are cast on.
How do you know how much yarn to leave for the tail?
How to determine how long of a tail you need is the million dollar question! If you are casting on a large number of stitches, you can wrap your yarn around your needle multiple times; measure then decide how much yarn to leave for the tail plus a little extra for good measure! For example, if casting on 200 stitches wrap the yarn around the needle ten times. Measure the yarn then multiply that number by 20. That will tell you approximately how much yarn to leave for a tail. Most of the time I just eyeball it, however it is not much fun when your eyeballing method comes up short and you must start over!
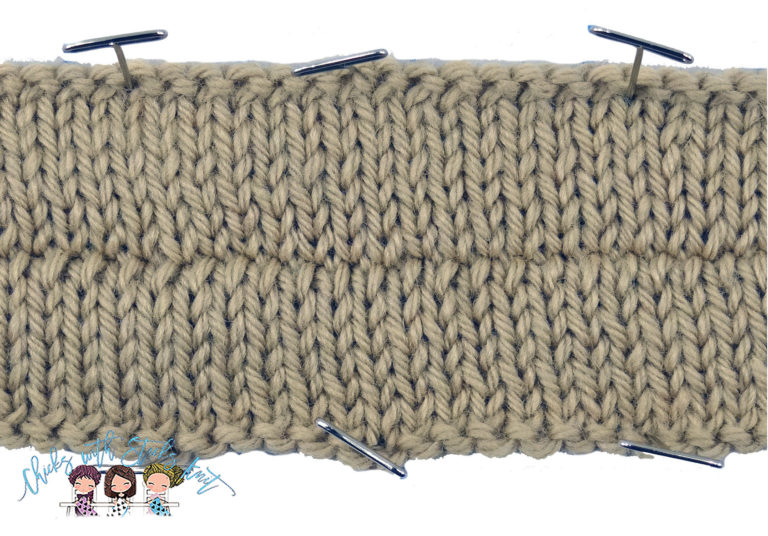
After your cast-on is complete you can start knitting. There is a bit of controversy surrounding which side is the right side (knit side) versus the wrong side (purl side). When I learned how to knit, and I would say when most people learn how to knit, this is not addressed. However, as your skills increase, and your knowledge increases you might observe that a long tail cast on looks very similar to the first row of knitting. According to Leslie Ann Bestor in her book “Cast On Bind Off 54 Step-by-Step Methods” she says, “Since this cast on makes the first row of knitting, you are ready for a wrong-side row when you begin knitting. In stockinette, for example, you would purl a row”.
Many patterns do not address this and simply have you begin with a knit row. How you decide to handle this is up to you, and please know that unless you intend to submit your knitting for judging this does not really matter. If you choose to proceed with the pattern, as it is written, after your cast-on, or choose to count your cast-on as your first row, no one will really know the difference. The key is to be consistent so if you are making pieces that need to be sewn together, they will match. The thing about knitting and reading patterns is that they can be interpreted many ways. There is no ONE right way or ONE wrong way.
Casting on is the foundation to knitting. Without the cast-on there is nothing to knit. What is your favorite cast-on? What was the first cast-on that you learned? Do you still use that cast-on? Reply in the comment section below. I love to hear about your knitting projects.
Knit with Love my Friend,