How to do a Tubular Bind Off for 1×1 Ribbing
A tubular bind-off is usually performed on ribbing and is the mirror image of the tubular cast-on. It is a great bind-off for ribbing at the bottom of a sweater, sweater cuffs, turtlenecks, cuffs of socks (tops), and hat brims. It creates an edge that looks like the ribbing just rolled over and never stops. It is also very stretchy, and smooth in appearance. This bind-off is not usually mentioned in patterns specifically but can be used when you are doing a 1×1 ribbing, alternating a knit stitch and a purl stitch. Sometimes the pattern will say to bind off loosely or with a stretchy bind off but anytime you are knitting 1×1 rib this bind-off can be performed even if it is not mentioned.
I will demonstrate how to do the tubular bind-off for 1×1 ribbing:
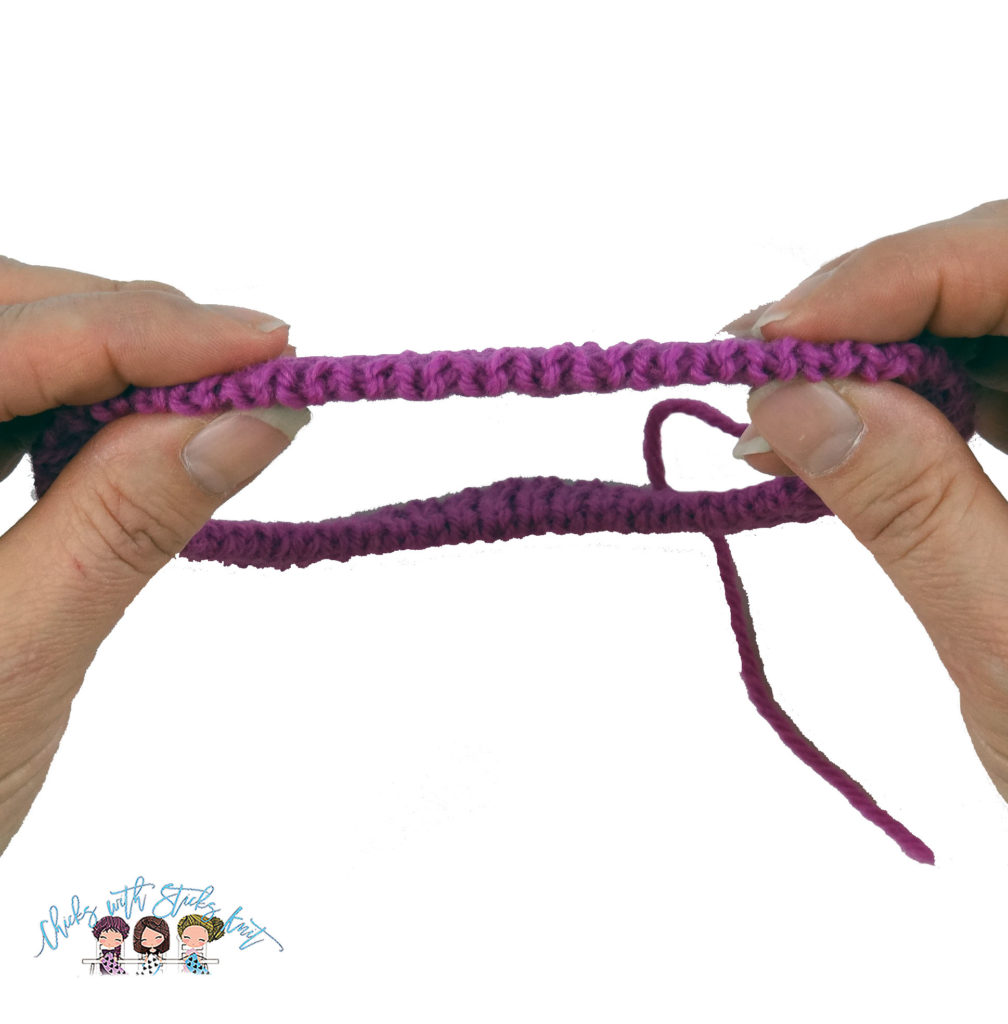
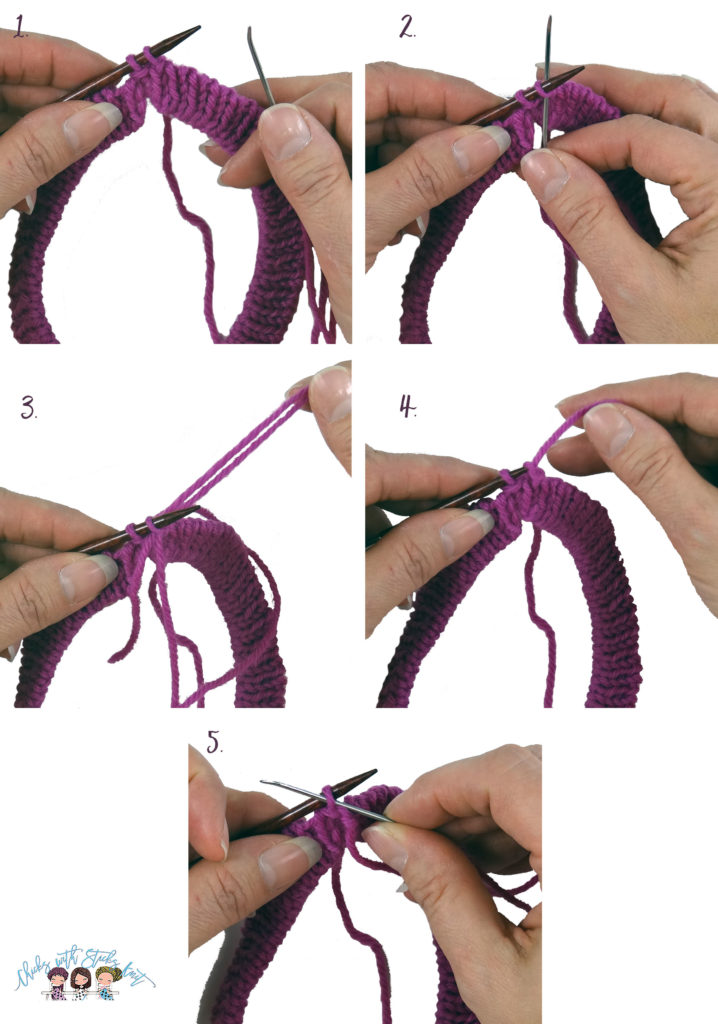
Cut your yarn four times the width of your project and thread it into a tapestry needle. Important, make sure you are starting step one with a knit stitch or your bind off will not look correct.
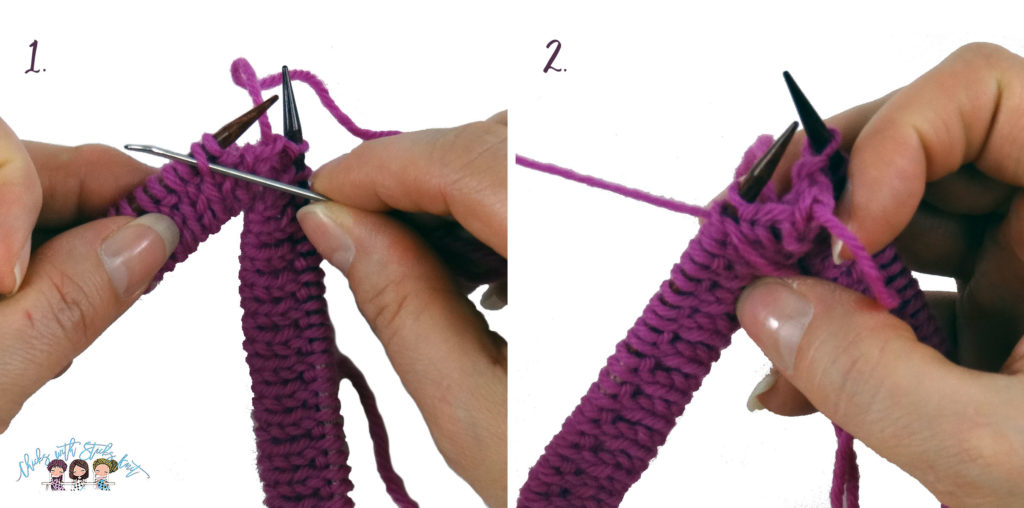
Step 1: Insert the tapestry needle knitwise into the first stitch and draw it through and slip it off. Give the yarn a little tug and stretch out the work so it lays flat.

Step 2: Insert the tapestry needle into the stitch that is now the second stitch on the knitting needle, purlwise and draw the yarn through. (It was originally the third stitch on the needle.)
Step 3: Insert the tapestry needle purlwise into what is now the first stitch on the needle and draw the yarn through, (it was originally the second stitch), and slip it off. Give the yarn a little tug and stretch out the work so everything lays flat.
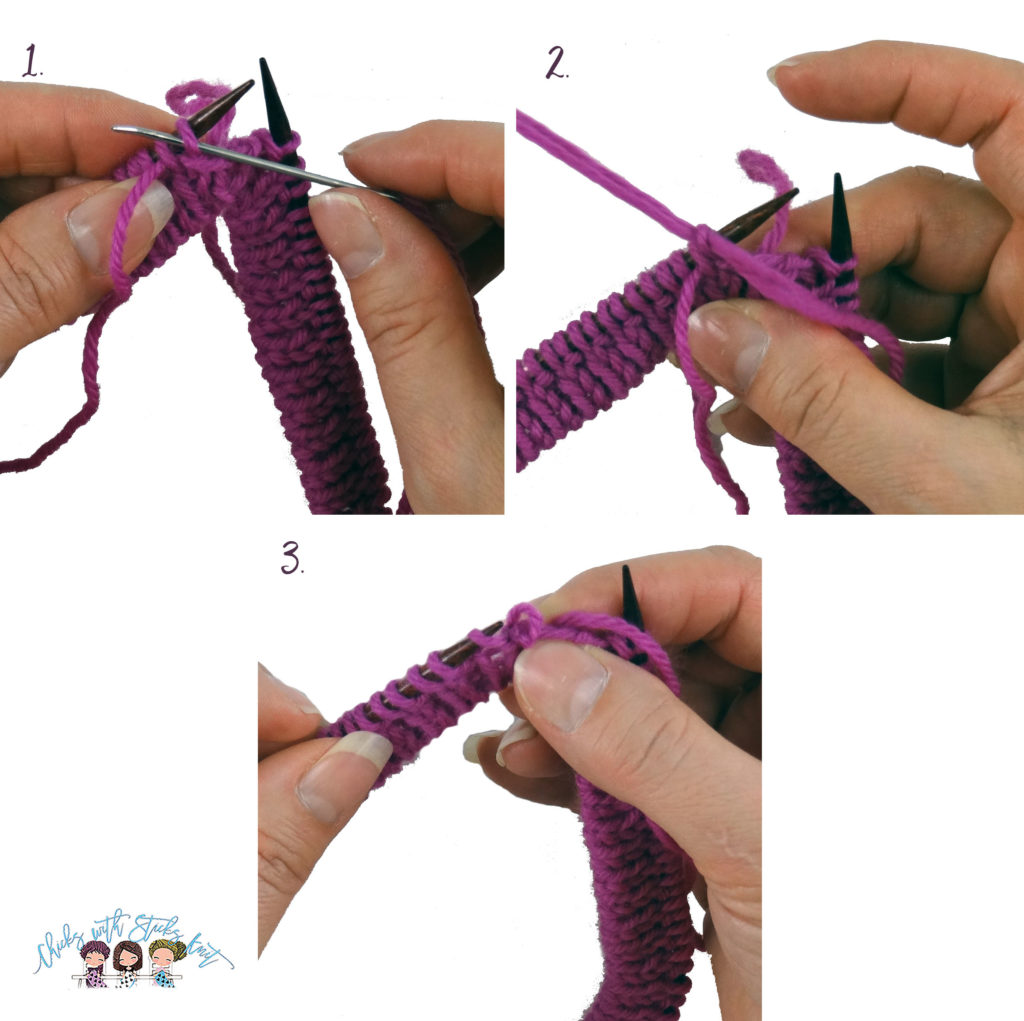
Step 4: From the back to the front insert the tapestry needle between the first two stitches on the needle, and draw the yarn through.

Step 5: Insert your tapestry needle knitwise into the second stitch on the needle and pull the tapestry needle towards the back of your work, and draw the yarn through.
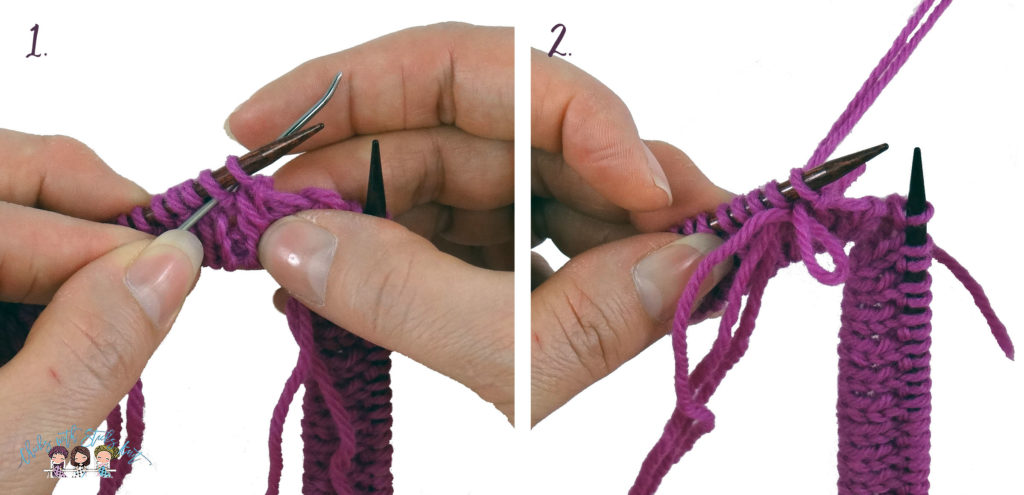
Repeat steps 1-5 until you have two stitches left. Then insert the tapestry needle knitwise into the first stitch and slip it off. Insert the tapestry needle into the last stitch purlwise and slip it off. Then you can weave in your end.
Tension is really important during this bind-off. If you leave the yarn too loose or pull it too tight your bind-off will not look smooth. I would suggest practicing it on a sample before using it on your project. This will give you a chance to see how your tension is before you bind-off your project. I have a tip for you that will help keep you on track with all the steps. Step one should only be done on a knit stitch so when inserting the needle knit wise and removing the stitch, the stitch should be a knit stitch. Step three should only be performed on a purl stitch so when you are inserting the needle purlwise and slipping it off the needle, the stitch should be a purl stitch. I think this will help you keep track of which step you are on.
The tubular bind off is time consuming, but it is well worth the effort. I most recently learned about this from the designer, Paula Pereira. Paula demonstrated this bind-off during my Color Work Sweater Class. The sweater’s Chevron Pattern Yoke used both the tubular cast-on and the tubular bind-off. Learning new techniques is one of the things I love most about knitting. In almost every project I do, I learn something. After I master a new technique, I love to share it with others. I would love to hear if you have ever used the tubular bind off for 1×1 ribbing and what you used it on. Be sure to reply below in the comments.
Knit with Love my Friend,


Very helpful and so glad for written instructions with photos. Suggestions. Label photos with letters rather than numbers because the steps are also numbered this was confusing.