How to Place a Lifeline in your Knitting
Have you ever made a mistake in your knitting and had to rip it back a long way? I wish I could teach you how to not make mistakes, but that is impossible. Instead I will show you how to place a lifeline so that when you do have to go backwards it is easier to get your stitches back on the needle. I will never forget the first time someone helped me rip a long way back in my knitting. They completely pulled the needle out of about 200 stitches and just started ripping. I thought I was going to pass out! What I learned from that though, was that your stitches don’t just disappear when you take them off the needle. However, a safer way to perform this task is to place a lifeline before removing the needle.
Lifelines are typically used in lace knitting or projects that are complicated. I show my students how to use them on any project. Fixing mistakes is challenging enough without worrying if you are going to lose your stitches. Lifelines can be placed at any spot in your work and how often you place them depends on your comfort level. I recommend placing them after pattern repeats and even before, and after, a very complicated rows. The idea of a lifeline is to hold your stitches so that they will not run down the column of stitches if you remove your needle. This is very helpful especially if you have slick yarn that slips easily.
Choosing the Correct Material
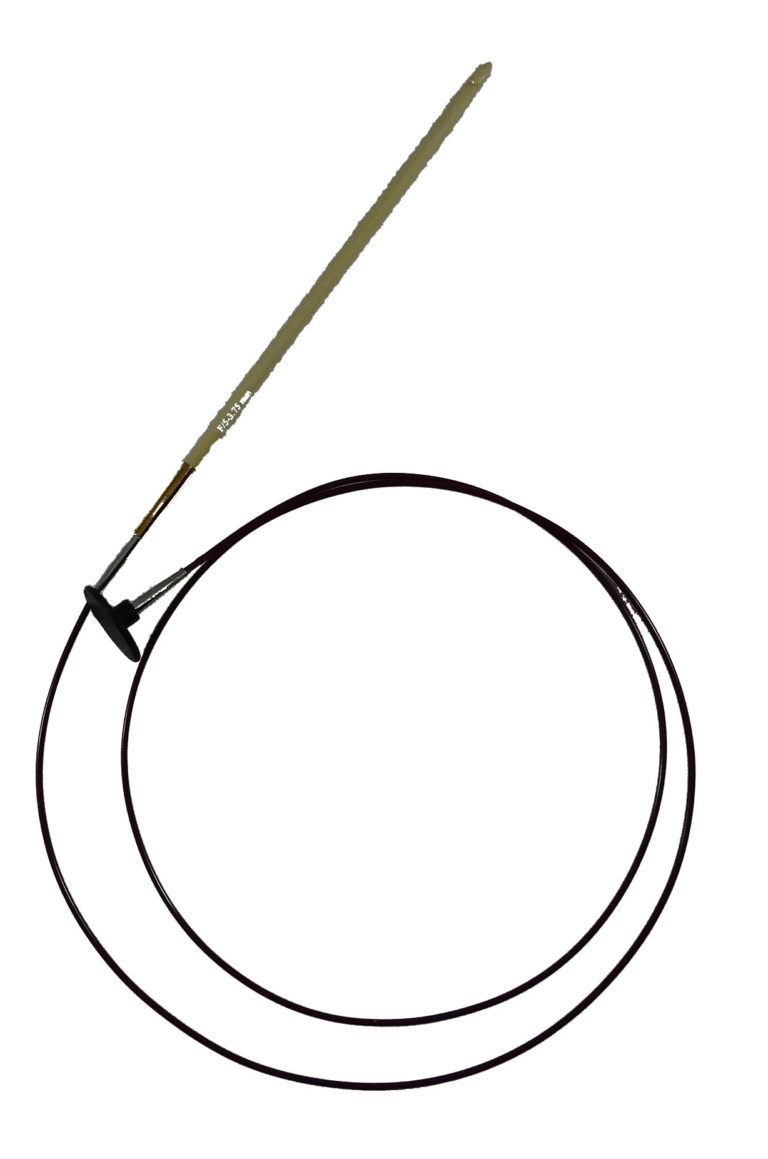
The material you use for your lifeline is really important. It must be thinner than the yarn you are currently working with and it must be smooth in texture so that it is easy to pull out. It is advisable to use a contrasting color from your work. Items like dental floss, Perle cotton, DMC floss or really thin yarn like silk, or smooth cotton, work well as lifelines. My favorite thing is Perle cotton. It can be found at most yarn or craft stores.
Inserting Lifelines
Using a Tapestry Needle
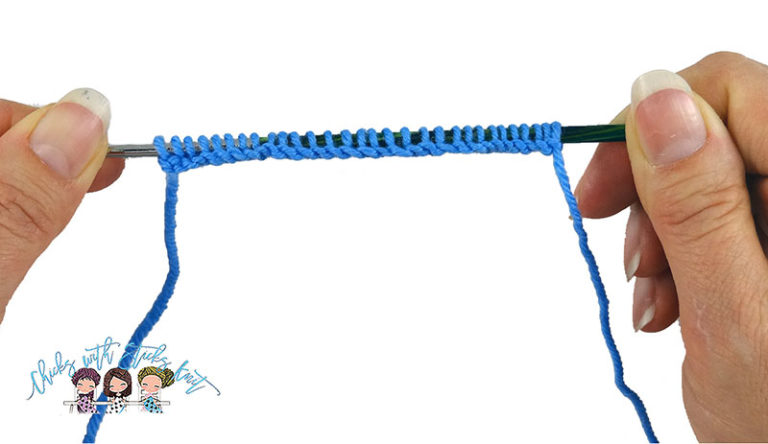
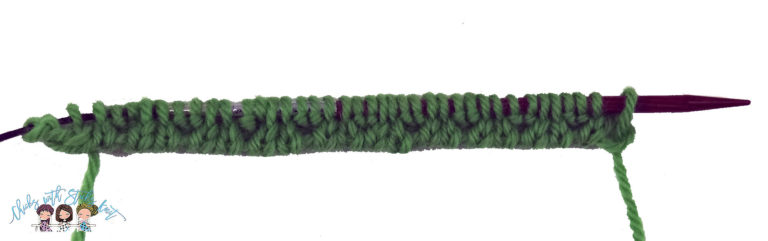
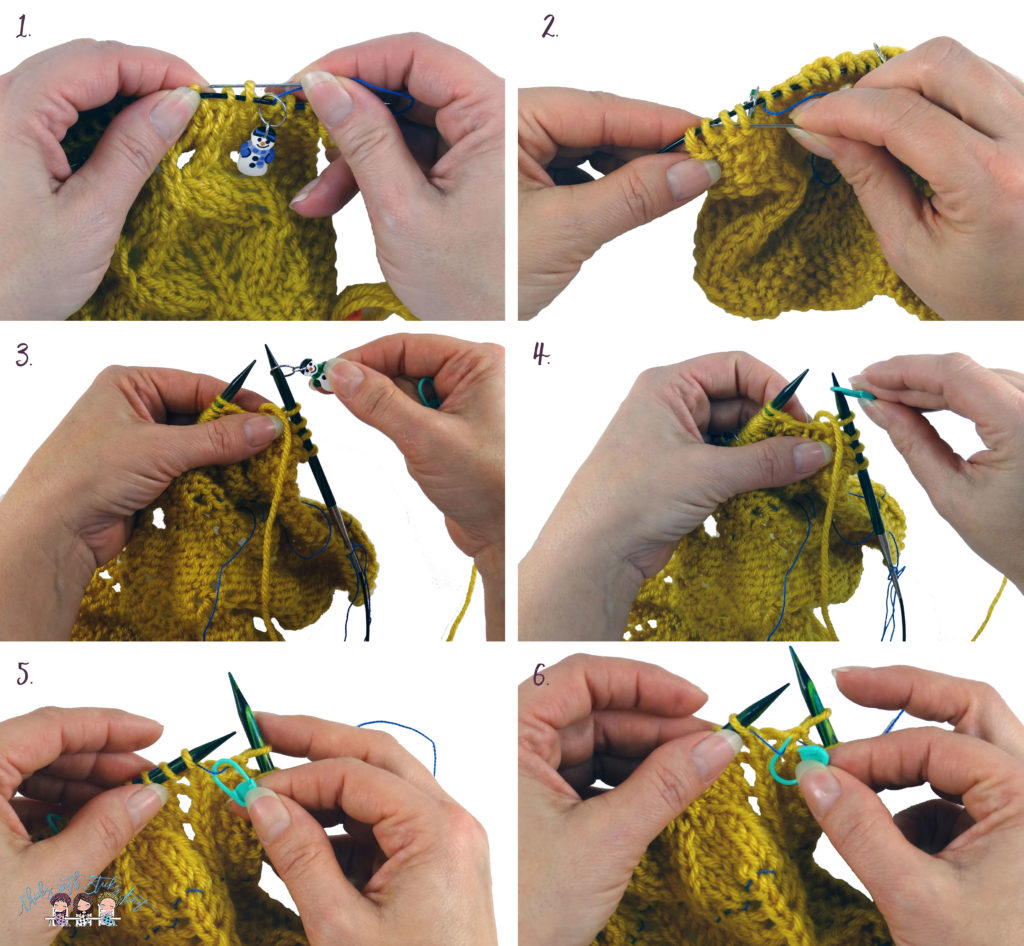
There are several ways to insert a lifeline in your work. The first is to use a tapestry needle and thread the lifeline through each stitch on the knitting needle being careful not to split the yarn. If you are using a circular needle you can move the stitches onto the cable, then thread the lifeline as this will give you a little more room to thread the tapestry needle and lifeline through.
Placing a Lifeline Several Rows Below
Another way to place a lifeline is to place it several rows below in the knitting. If this is required, I like to find a row that does not have any increases or decreases if at all possible. That way I can make sure I get my lifeline through every stitch. Thread your needle through the right leg of every stitch so that the stitches are not twisted.
Placing a Lifeline Using Interchangeable Needles
Finally, another way to place a lifeline is when you use interchangeable needles; there is a tiny hole for tightening the knitting needle tip to the cable. You can thread your lifeline in the hole and just knit. As you knit across the row the lifeline will follow your yarn and go through every stitch.
Stitch Markers
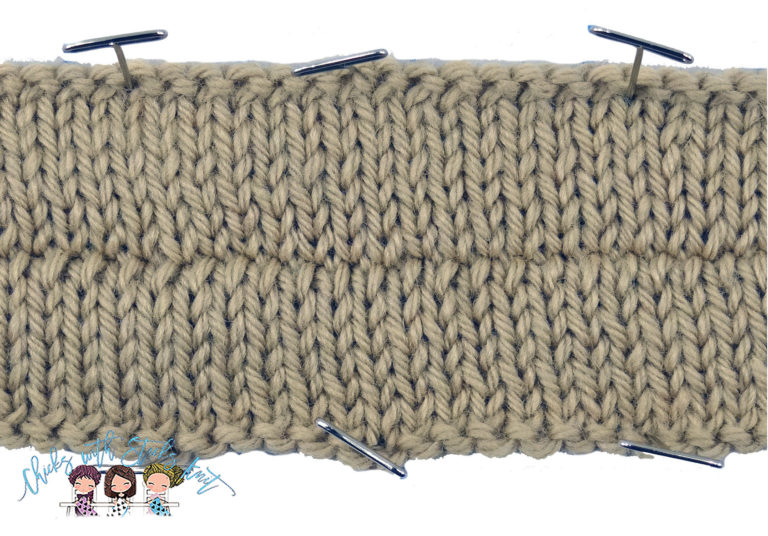
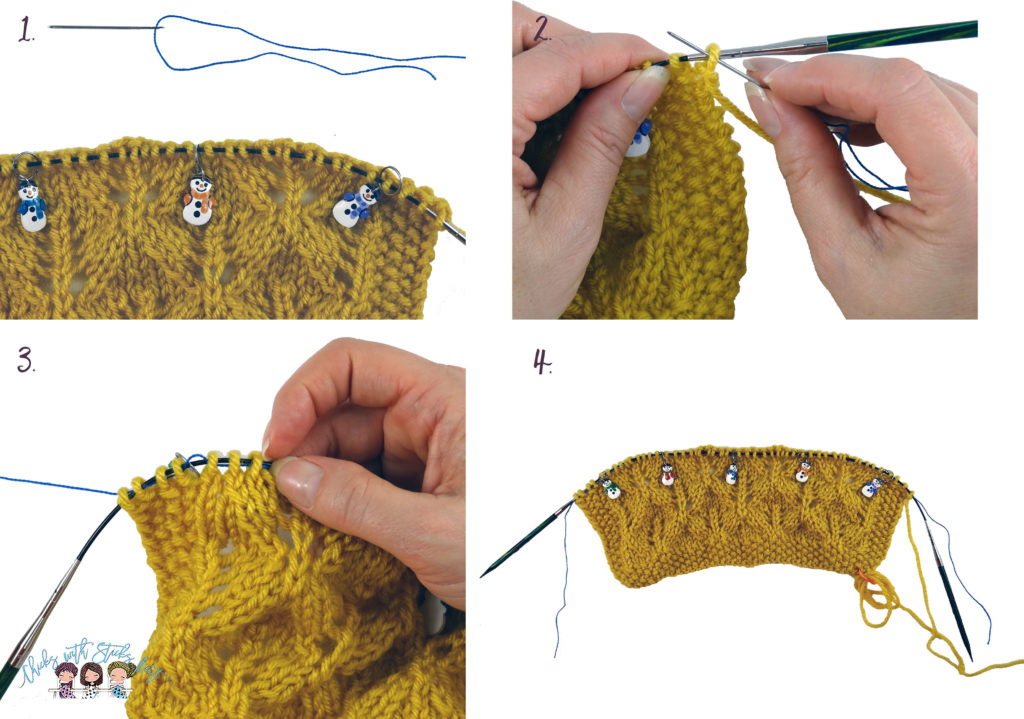
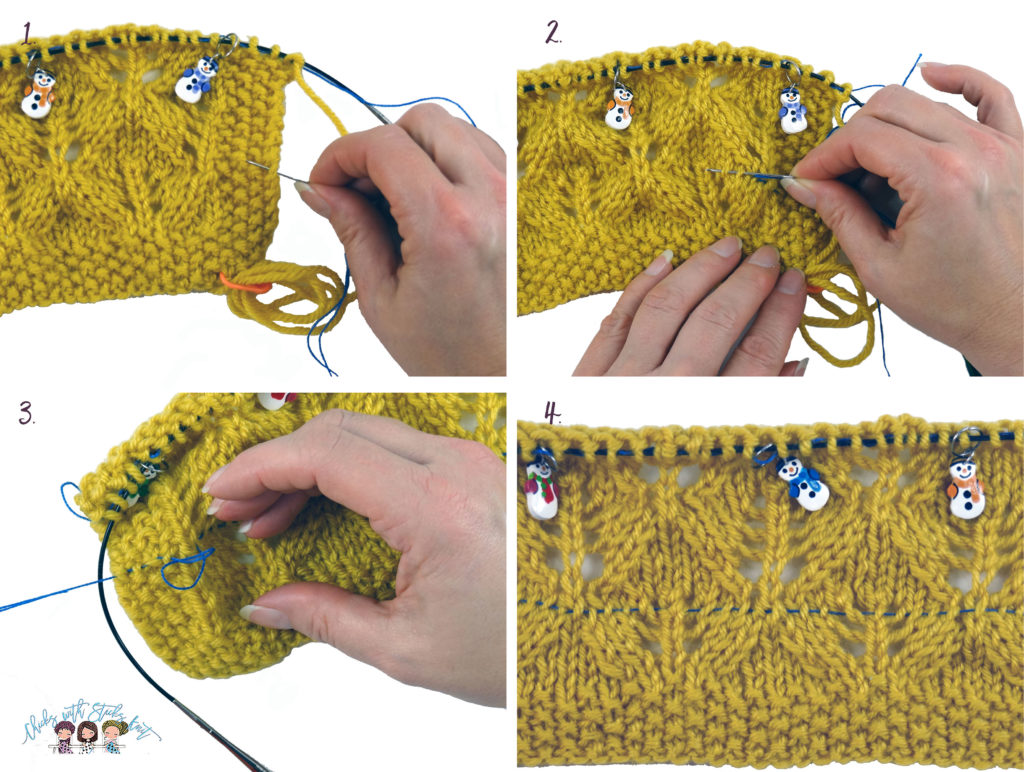
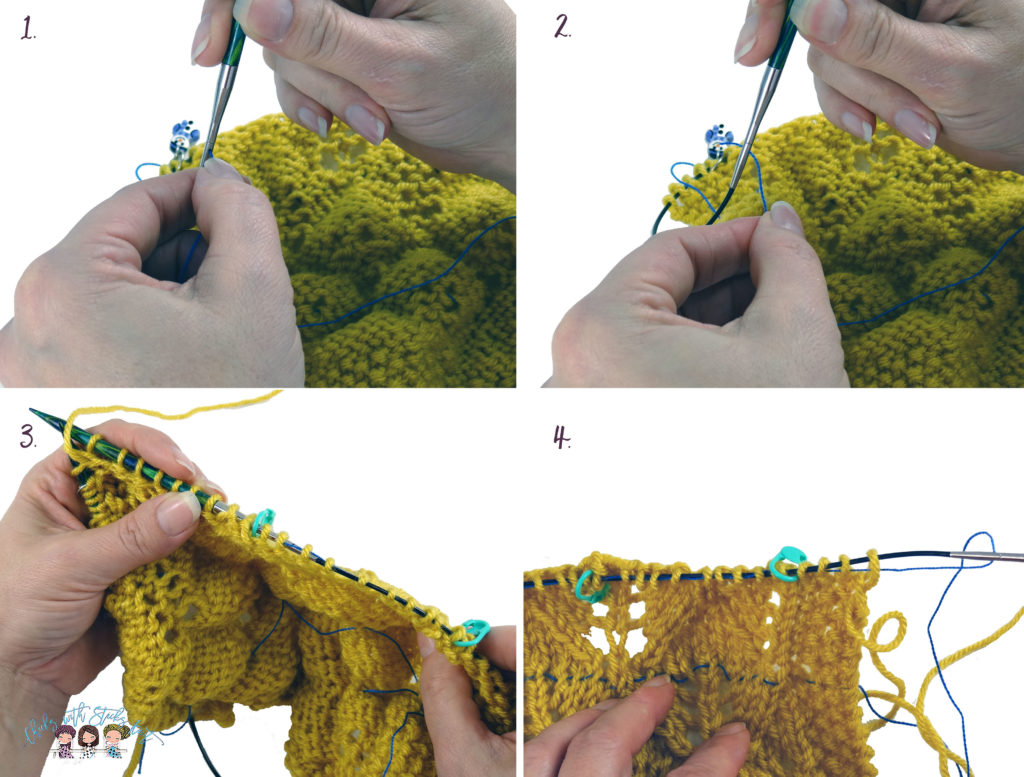
The most important thing to remember when inserting a lifeline is to avoid threading it through stitch markers. See photos 1 & 2 below it shows how you thread the lifeline without catching the stitch marker. This is easy to forget and even though I know I am not supposed to do it every once in a while, I still do. When you thread the needle through the stitch markers the markers become stuck on the lifeline and will not move up as the knitting progresses. Removable stitch markers are nice because if you accidentally thread the lifeline through the markers they can be removed. If you have stitch markers on your knitting needle and are using the method of threading the lifeline by using the hole in your interchangeable needles, replace them with removable stitch markers so that on the next row you can open the marker and remove it from the lifeline.
Multiple Lifelines
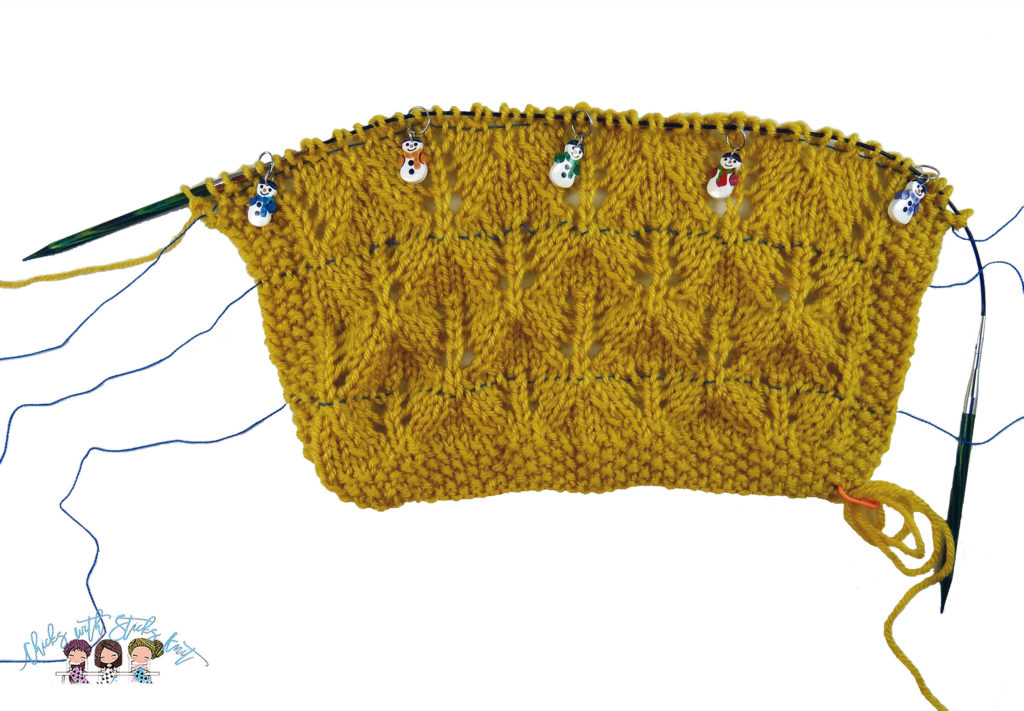
It is a good idea to leave your previous lifelines in place. I like to work with about three or four separate lifelines. The reason is that, occasionally, mistakes are not visible right away in your work. Removing the lifeline too soon makes it difficult to go back if you find a mistake later. Leaving a few lifelines in place makes it easier to pick up your stitches if you need to go back a long way.
Note Where the Lifeline is Placed
Make a note of where you placed your lifeline. This is important because it will make it easier to find your place in the pattern if you know which row to resume knitting if you need to go back to your lifeline. Also, be sure to cut your lifeline material long enough; if the length of the lifeline does not cover the width of your project with a couple of inches on each side it will come out of your knitting.
Fixing a Mistake
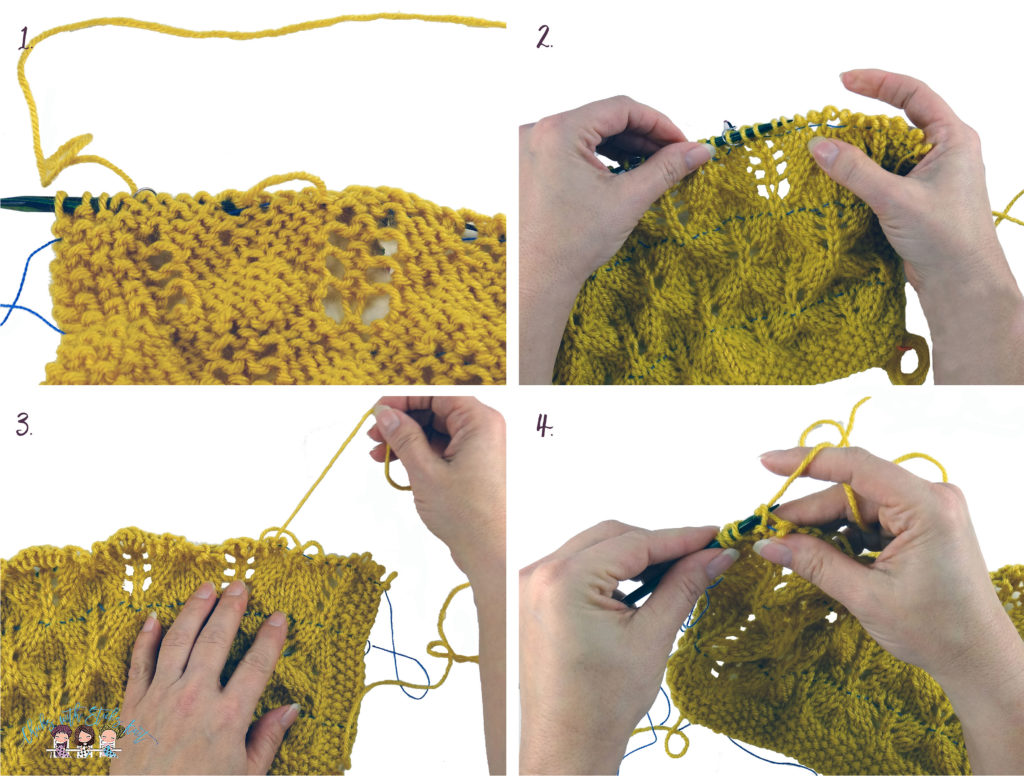
If you make a mistake and need to take your knitting back to the lifeline, I recommend removing the knitting needle from your work and pulling out each row, rolling the yarn as you go, to avoid tangles. Stop at the row above your lifeline. As you pull each stitch out from the row above your lifeline, place each stitch on the needle as you gently pull them out one by one. This will make it easier to put your stitches back on the needle. Next, make sure you count your stitches to ensure you picked them all up. If you are missing a couple, I suggest you pull the lifeline out (after your stitches are on the needle) mark back the next row. Usually I will find any stray stitches when I do that. The reason I recommend stopping at the row before the lifeline is because sometimes the stitches can be difficult to put on the needle if you go directly to the lifeline. Occasionally I have ripped back to the lifeline and the stitches have become too small to pick up. They won’t slip all the way because the lifeline is holding them. However, by stopping the row before I think it is easier to put them back on the needle.
Mistakes are inevitable so knowing how to fix them is the only way to keep yourself progressing with your knitting. A lifeline can be helpful in difficult or lace projects, but it can also be helpful any time you find yourself making mistakes so don’t reserve this technique for just the hard projects. I know it is painful to have to take your knitting back several rows but using a lifeline will make it easier to get your stitches back on the needle and to figure out which row you are on. Let me know, below, whether you have found using lifelines helpful. I love hearing from you and reading all your comments!
Knit with Love my Friend,