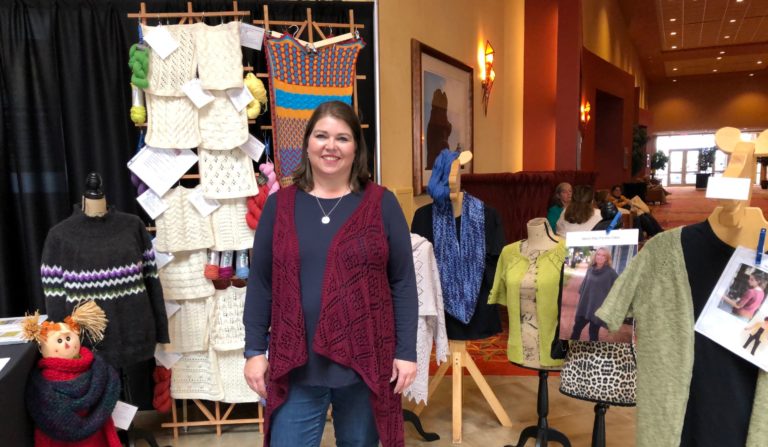
Tackling Top Down Sweaters
Top down sweaters can be fun to knit because you don’t have to sew them together like a traditional sweater, where you knit the pieces separately and then sew them. There are so many beautiful patterns to choose from in the top down sweater area, but the construction for each is very similar.
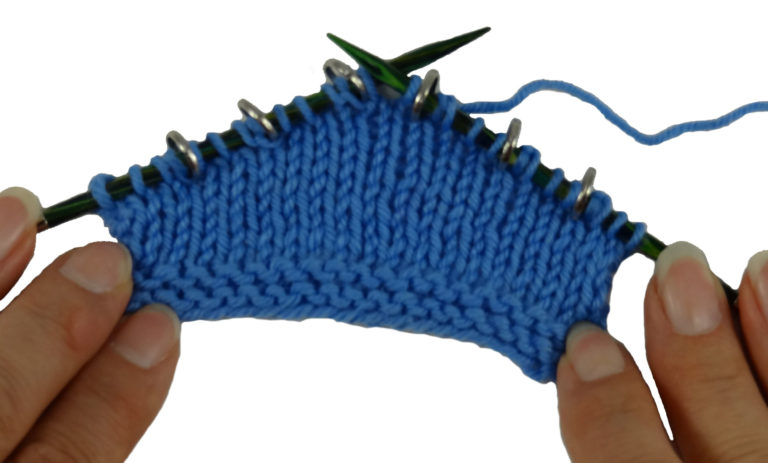
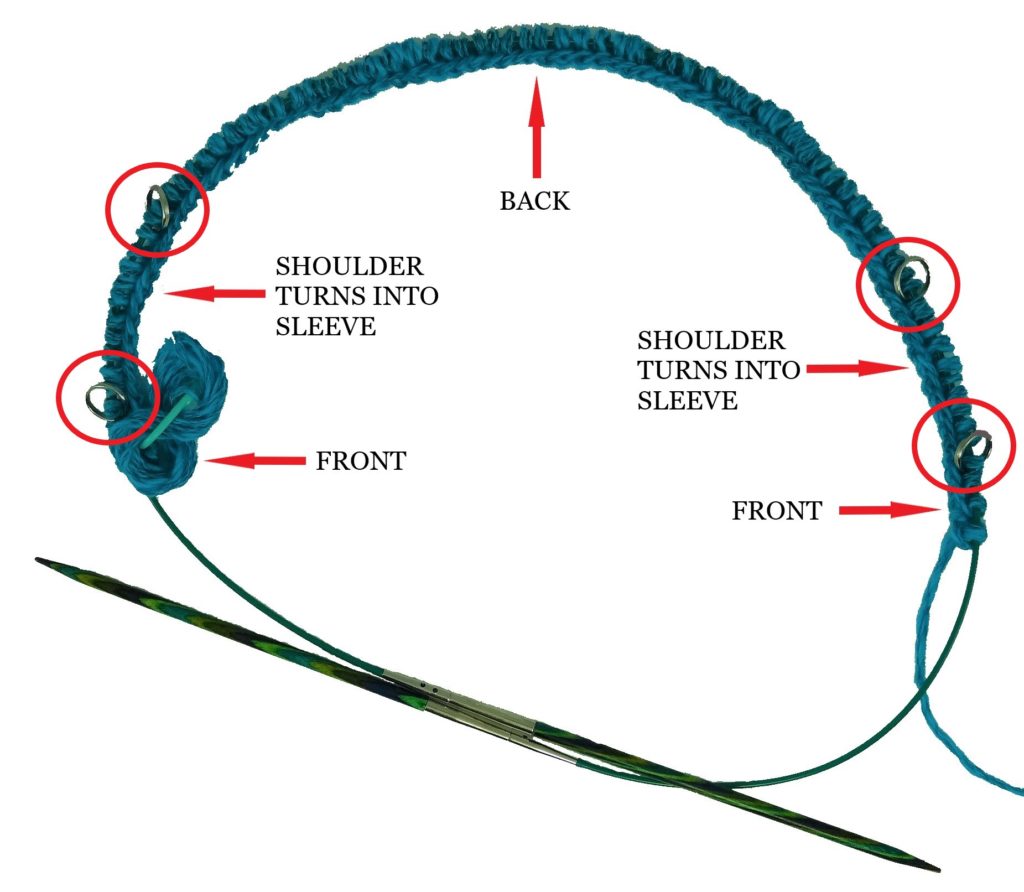
You always start at the neckline. Your pattern will tell you to cast on the required number of stitches, and then on the first row you usually place markers. These markers are to mark the specific points where you will be increasing. At first it may seem confusing to understand where you are but if you think about how the garment will go on your body, I think it helps. You will place markers to separate the front from the sleeve section and use markers to separate the sleeve from the back. Your increases will take place at these markers. So, if you look at the photo below, the first few stitches will be your front and you will increase at the beginning and at the marker, so it grows larger. The next set of stitches between the first two markers is for the shoulder and you will increase at each marker, eventually it will grow into your sleeve. The next section, the larger section is the back. Increases for the back will be at each marker as well. Next you have your second shoulder and sleeve where you will increase at the beginning marker and the ending marker. The last few stitches is the opposite front where you will increase at the marker and towards the last couple of stitches. The increases will allow the sweater to grow from the neckline, the increases accommodate your shoulder and start to form a sleeve.
The best piece of advice I can give you here is that it is important to count your stitches on every increase row otherwise it is easy to get off track at some point, and if you haven’t been counting you don’t know for sure where you made a mistake. I find that taking the time to count and keep track of where I am saves me time in the long run. I place additional markers every 25 stitches to help with the counting process. That way I can count 25 stitches quickly and easily.

On this pattern I wrote out the number of repeats I needed to do then figured the stitch count in each section on every row. I know this isn’t the fun part of knitting, however it is extremely helpful for you to keep track of which row you are on and how many stitches you have in each section of each row. If you put your knitting down for a while it is easy to lose your place. Writing out a chart will help you to know where you are even if you take a break in the middle.
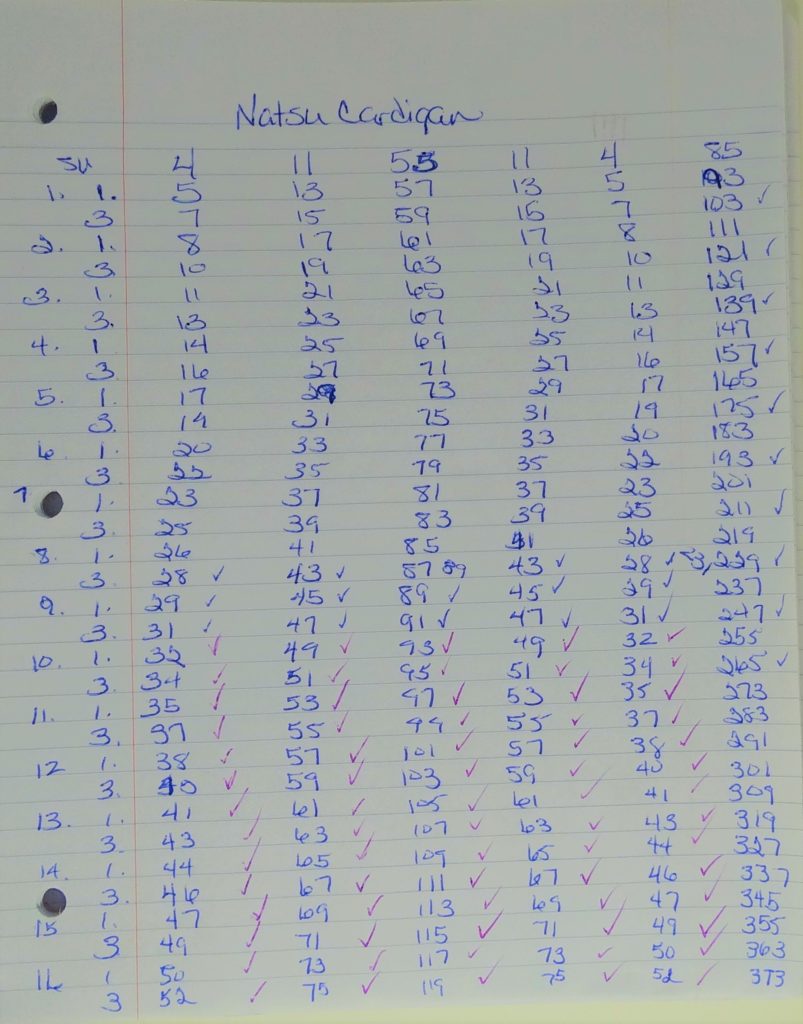
Not very pretty but it does the job!
Once you have completed the first section of increases, your pattern will tell you to divide for your sleeves. This means you will put the sleeve sections on some waste yarn. Make sure you are generous with the piece of waste yarn so that you can try on the sweater. You will come back to the sleeves later and put them back on a needle to continue knitting them until completion. By taking the sleeve sections off your needle you will be working on the body of your sweater, from the underarm down. The benefit of a top down sweater is that after you divide for the sleeve and knit a couple more rows, you can try your sweater on. To be honest with you, I have started over at this point before. My sweater just did not fit me properly in the shoulders and I needed to knit a larger size. I know that seems like a lot of knitting to just pull out and start and not be able to wear it because it did not fit properly.

From here you just continue knitting as your pattern calls for. You may have a lace design, or it may be stockinette. One of the other benefits of a top down sweater is that you can knit it to the perfect length. You can accomplish this by trying it on as you go and stopping when it seems right. If you do this be sure to allow for a border on the bottom because most patterns have you finish the sweater in some way that could add several inches to it. The other way you can do it is by measurement. I measure a piece of with your completed work.
I hope this inspires you to give your first top down sweater a try. Knitting is so rewarding, and knitting sweaters seem to be many people’s ultimate goal in knitting. Trust yourself to give something new a try and know that you will learn in the process. Start by just focusing on one step at a time. When I read the whole pattern and don’t understand everything all at once I just trust that when I get to that step it will make sense, and most of the time it does. So just get started one step at a time. Top down sweaters are really fun to knit, and I think they go quickly. The big bonus with top down sweaters is that you don’t have to sew them together. And if you get stuck ask for help. I have found that most knitters are willing to help each other.
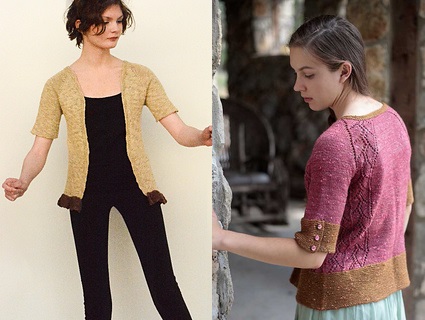
My summer sweater class will start in just a few short weeks. For class you can choose the one you like the best. The Natsu Cardigan will be a little easier, and the Enchanted Rock will be a little more on the challenging side with the lace added in. You can sign up for classes at thestichinden.com. I hope you join me and together we will tackle your first top down sweater!
Knit with Love my Friend,