How to do a Provisional Cast-On or Crochet Chain Cast-On
Occasionally a knitting pattern will call for a cast-on that you might be unfamiliar with. Don’t set the pattern aside; look for help! The provisional cast-on was one of those cast-ons that used to scare me! Now that I have used it several times though, I feel confident with it. Practice makes new techniques easier.
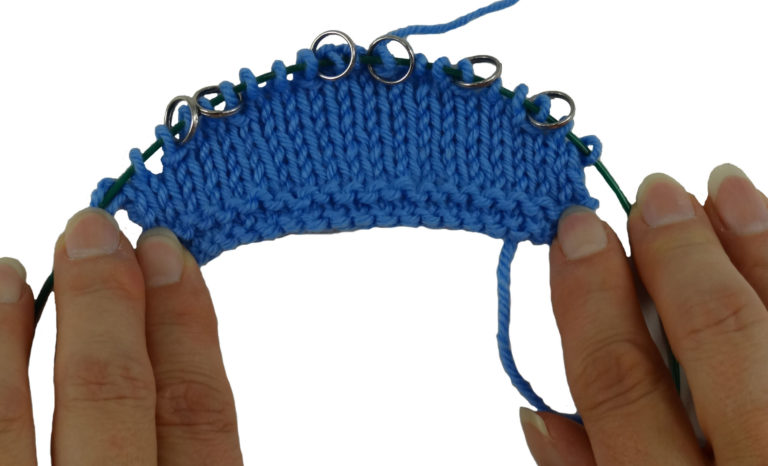
A provisional cast-on is only temporary. It is started with waste yarn that is smooth in texture, a similar weight to your working yarn and light or contrasting in color to your working yarn. Cotton yarn works well. The provisional cast-on keeps the stitches live so that they can be knit in the opposite direction later. Once the project is completed the provisional cast-on is removed and placed onto a needle so it can then be worked. I have seen this on projects like shawls and sweaters. On a shawl you can knit a border in the opposite direction. I have used it to cast on a top down sweater where the provisional cast on edge is then used to knit a collar later. I have most recently used this cast on to work a Tubular Cast On.
Let me show you how to perform the provisional cast-on:
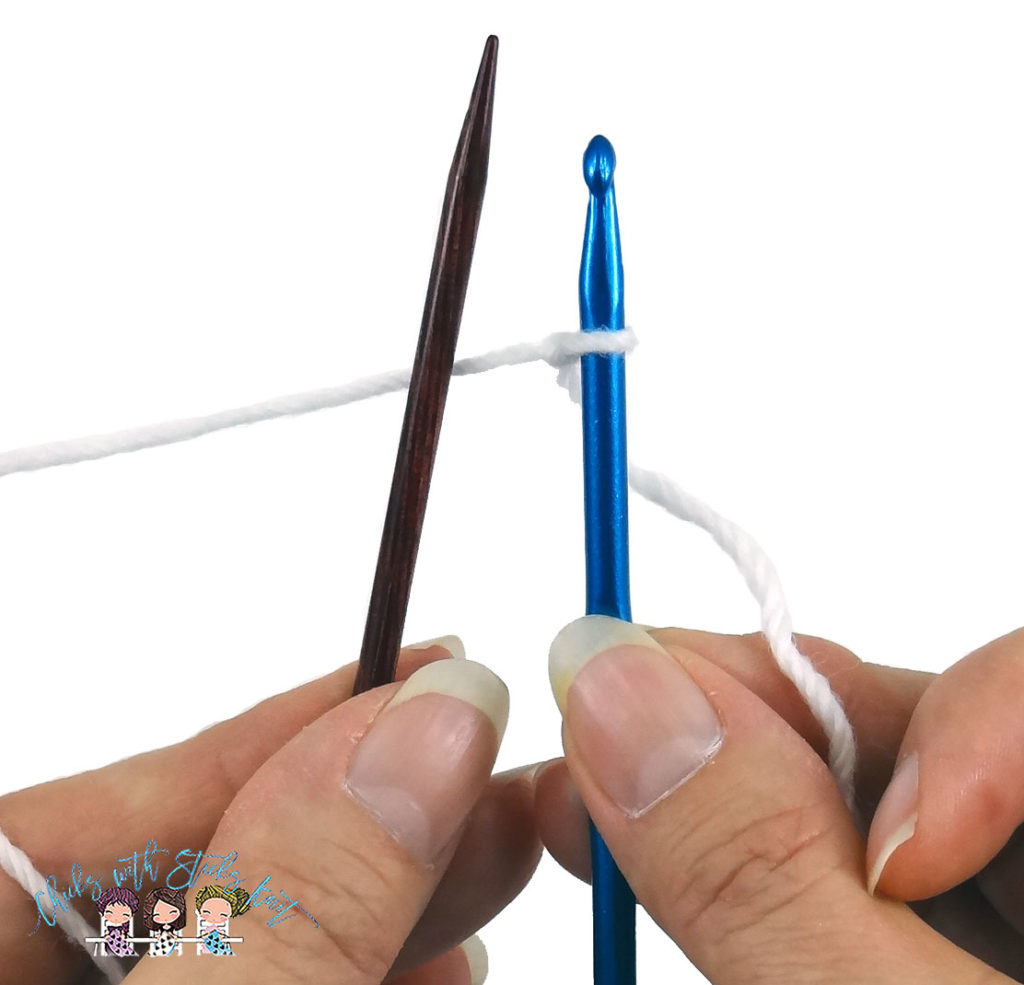
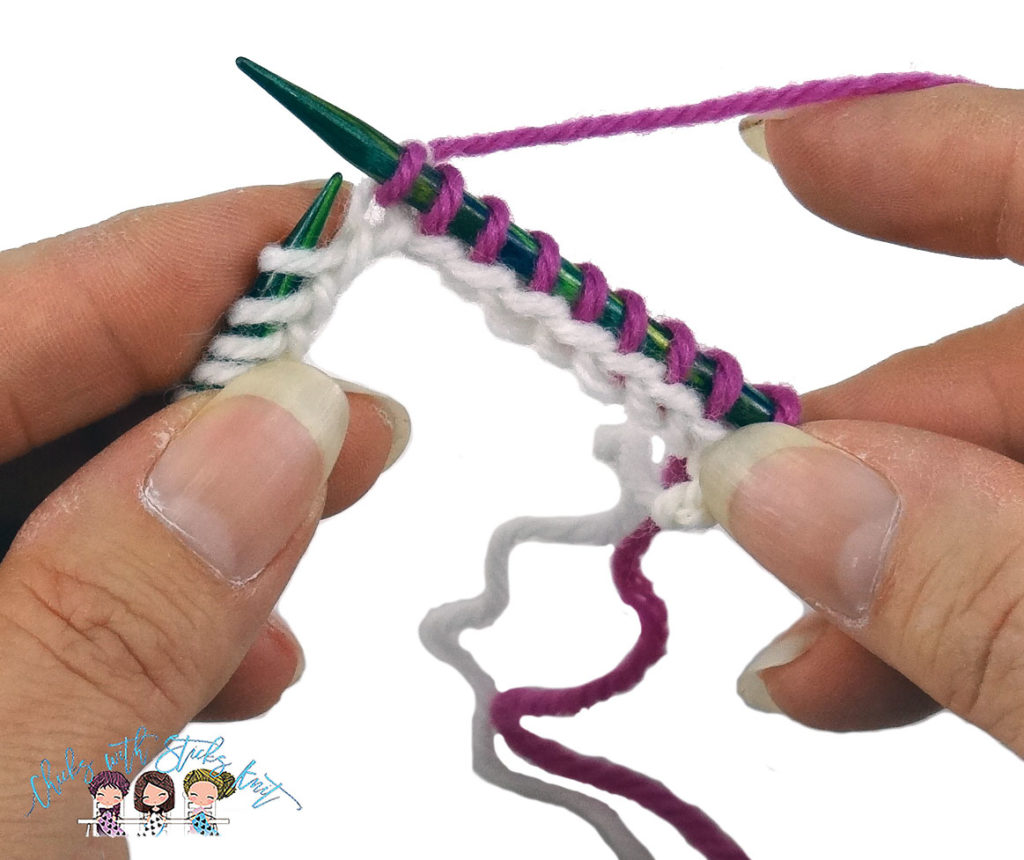
Step 1: Tie a slip knot with waste yarn and place it on a crochet hook that matches the knitting needle size that the pattern calls for.

Step 2: Hold the knitting needle in your left hand and the crochet hook in your right hand but close together. Place the yarn behind the knitting needle.
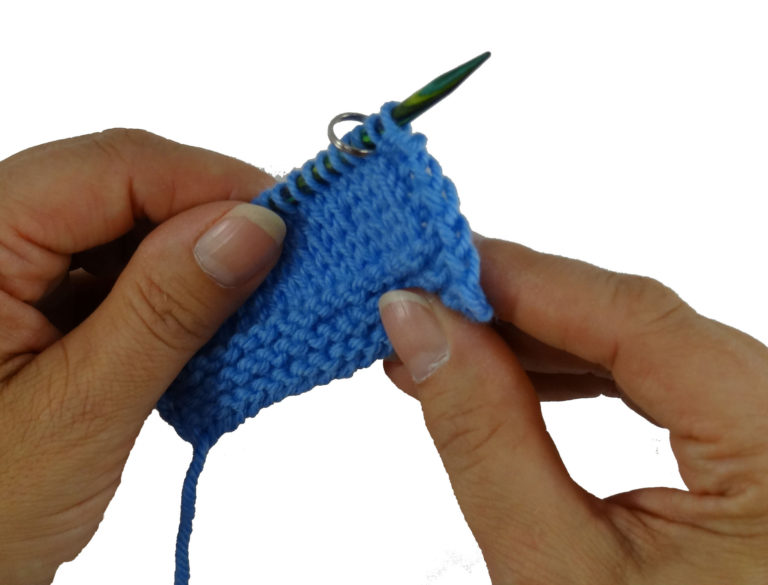
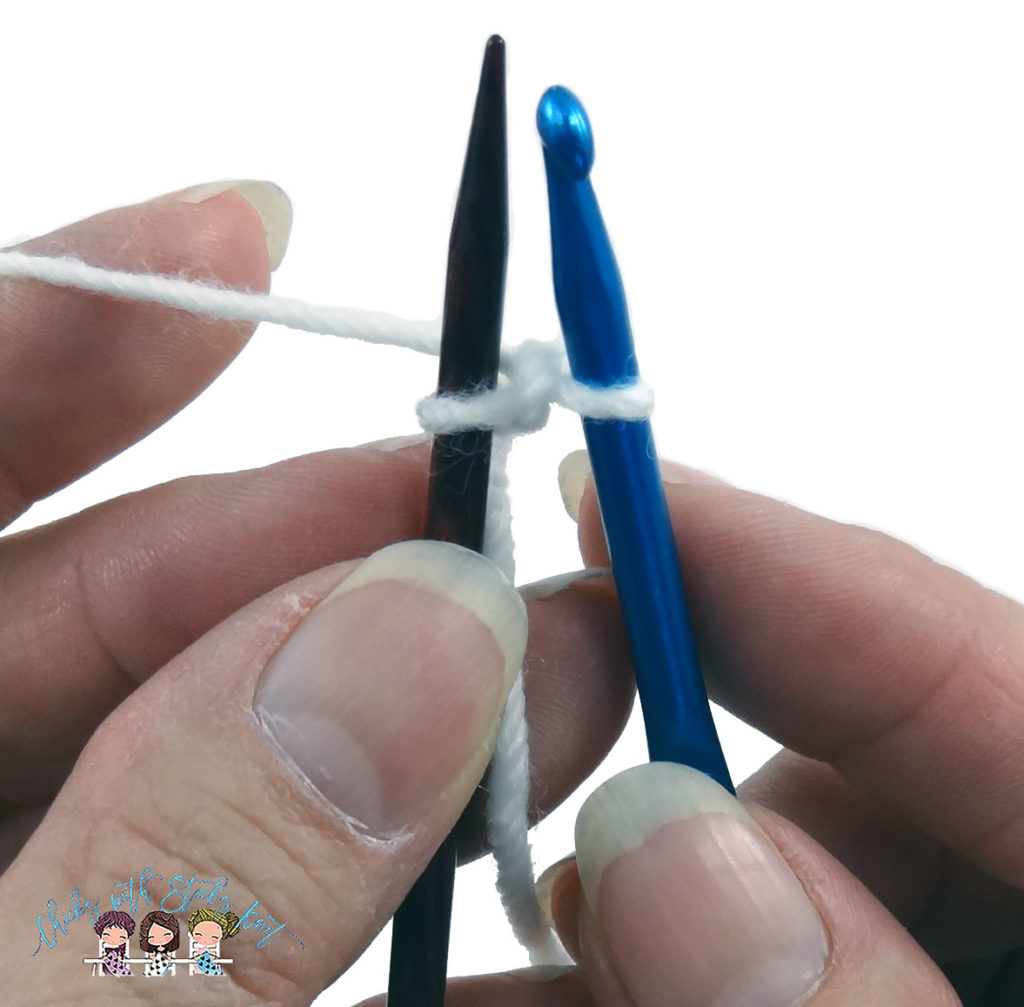
Step 3: Use the crochet hook to reach across the needle, hook the yarn and pull it through the stitch that is on the crochet hook.

Step 4: Place the yarn behind the knitting needle. Repeat steps 3 and 4 until the required number of stitches have been cast on.
Step 5: When the required number of stitches are cast on crochet 2-3 more stitches at the end. Cut the yarn and pull it through. This will be the end you unravel when you are ready to place the stitches back onto the knitting needle.

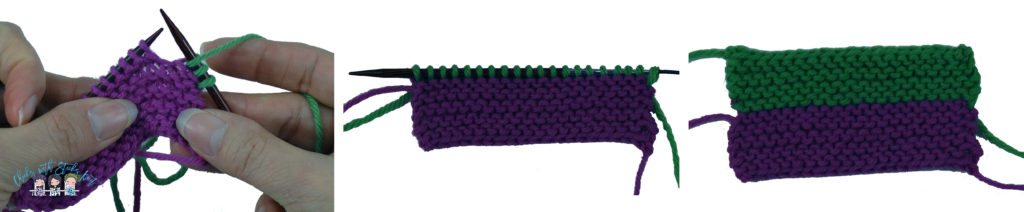
Step 6: Begin to knit into the waste yarn stitches with the working yarn.
This completes the provisional cast-on. When the project is completed the provisional cast-on is placed onto a knitting needle and worked in the opposite direction.

Step 1: Unravel the extra chains that were crocheted at the end of the cast on.

Step 2: Very carefully, without pulling too hard, pull out the first crochet stitch on the work. This will reveal a stitch. Slip the stitch onto a knitting needle. I prefer to slip the tip of a knitting needle into the stitch before I remove the crochet chain. This prevents the stitches from unraveling. It can be helpful to use a smaller needle size when placing the project back on the needle. Just be sure to remember to switch to correct needle size before knitting.

Step 3: Repeat until the end.

Step 4: At the beginning of the crochet chain it will appear that the tail end of the waste yarn is sticking through one half a stitch. Place that very last stitch onto the needle before you remove the tail end of the yarn. This should give you the exact number of stitches that were cast on.

Now the stitches are ready to be worked in the opposite direction according to the pattern. The provisional cast-on eliminates the need to pick up stitches when working in the opposite direction.
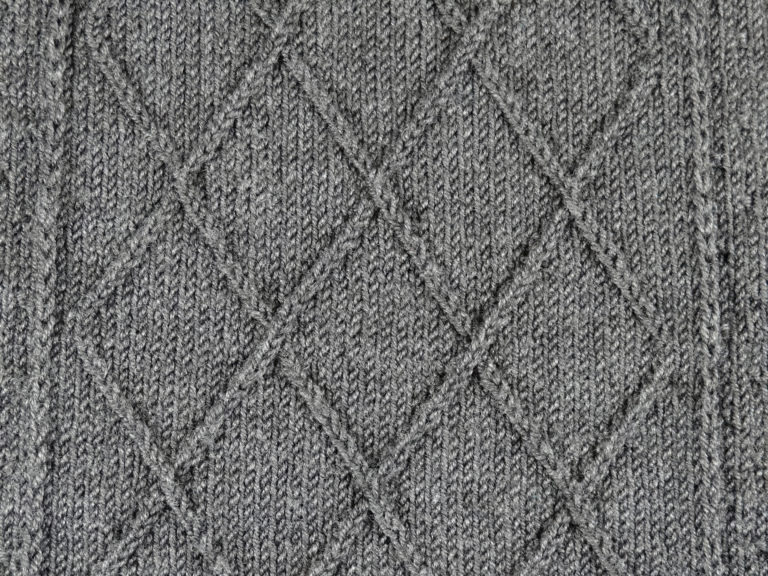
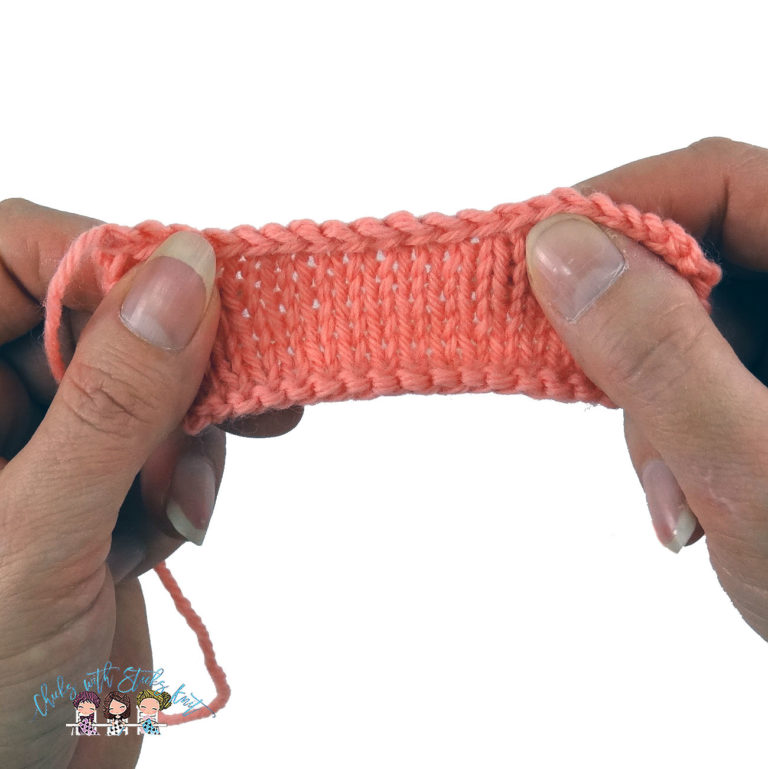
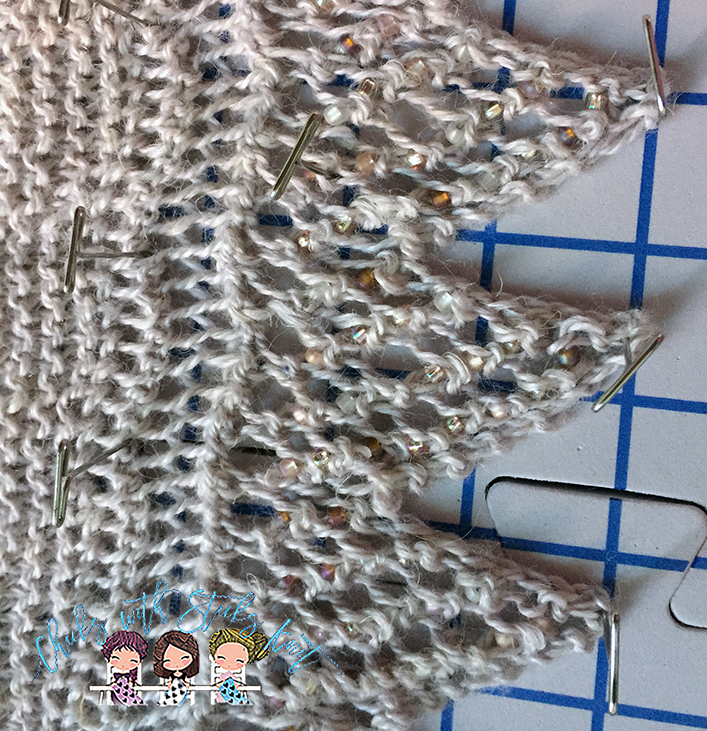
It is perfect for projects that require a border. Here is an example of a lace piece I knit that was started with a provisional cast-on. Each end is identical, and it appears to be seamless on the back of the work.
Let me know below if you have used a provisional cast-on before and what kind of project you used it for. I love hearing about your projects!
Knit with Love my Friend,