How to do an I-Cord Bind Off and Graft it Together in the Round
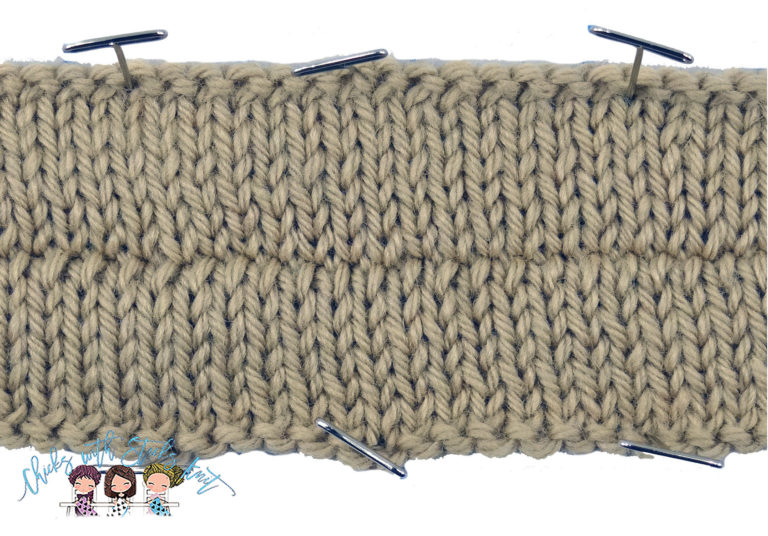
An I-Cord Bind Off is a little gem that creates a decorative edge and is the same on both sides. It is great fun and much easier to do than most people think. The result is an I-Cord band along the edge of the fabric. It adds stability to the edge but is still flexible enough that it can be done on a neckline. The three-dimensional, rounded edge makes it a perfect border for blankets, shawls, necks, cuffs, pocket openings, and it can be substituted for any crocheted border.
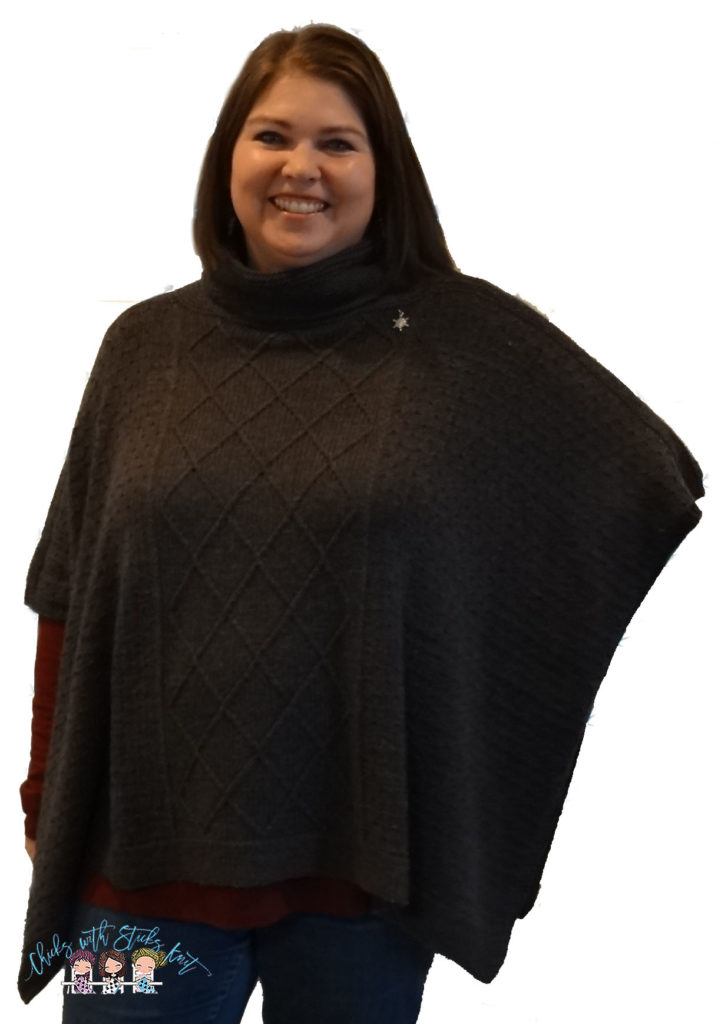
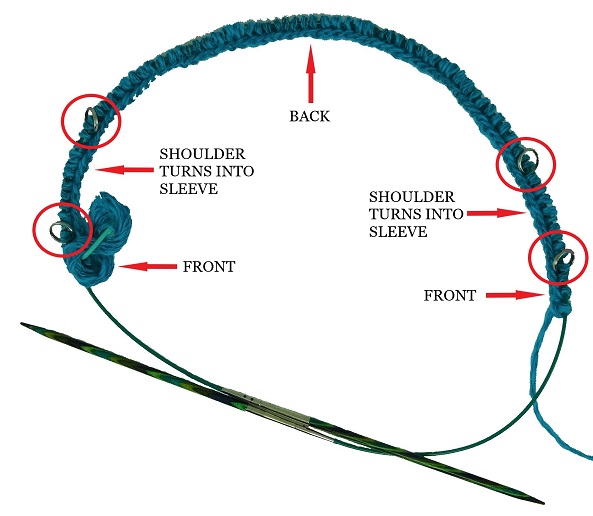
I most recently used it on the Match Play Poncho. It gave the cowl neckline the perfect finished edge. It looks the same on both sides so as the cowl is folded over it can still be seen. I am very pleased with how it turned out. I will demonstrate how to perform the I-Cord Bind Off. I will show you how to do this technique in the round, however it can also be done on flat knitting.
Step 1: With the right-side facing cast on three stitches using the knitted cast on.
a. Insert the right needle into the first stitch.
b. Wrap the yarn and draw it though. Do not remove the stitch from the left-hand needle.
c. Slip the knitted stitch onto the left-hand needle by placing the tips of the needles parallel and slip the left needle under the stitch from the bottom up. This method adds a twist to the stitch and gives it more stability.
d. Repeat until three stitches have been casted on.
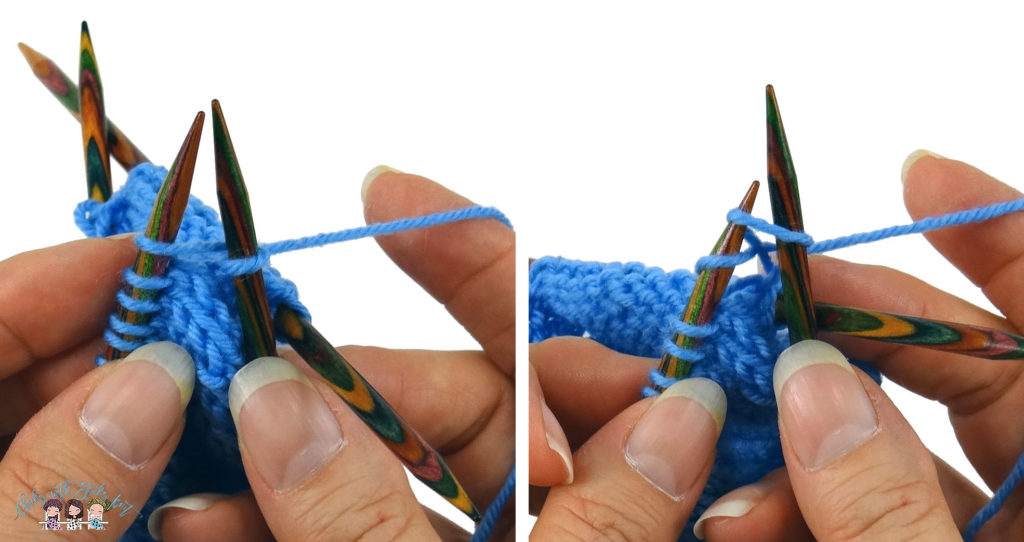
Step 2: Knit the first two stitches.
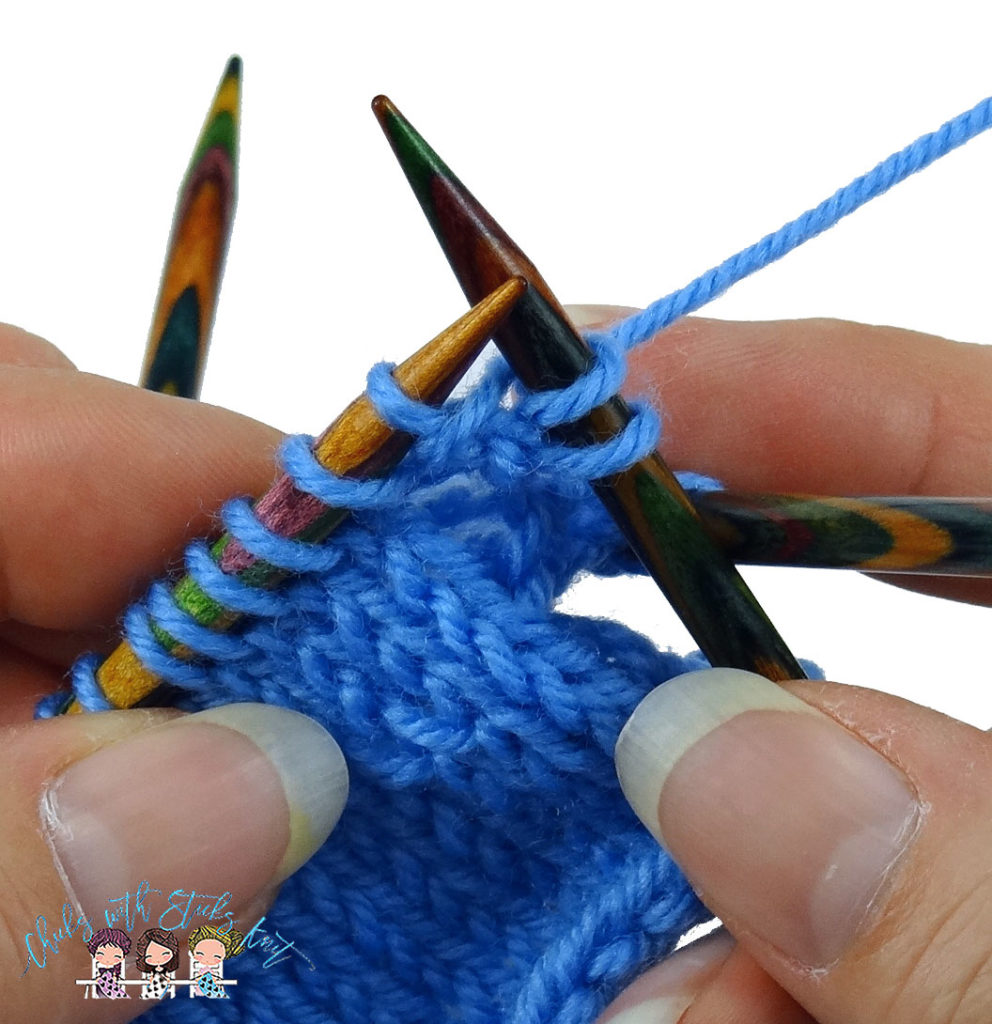
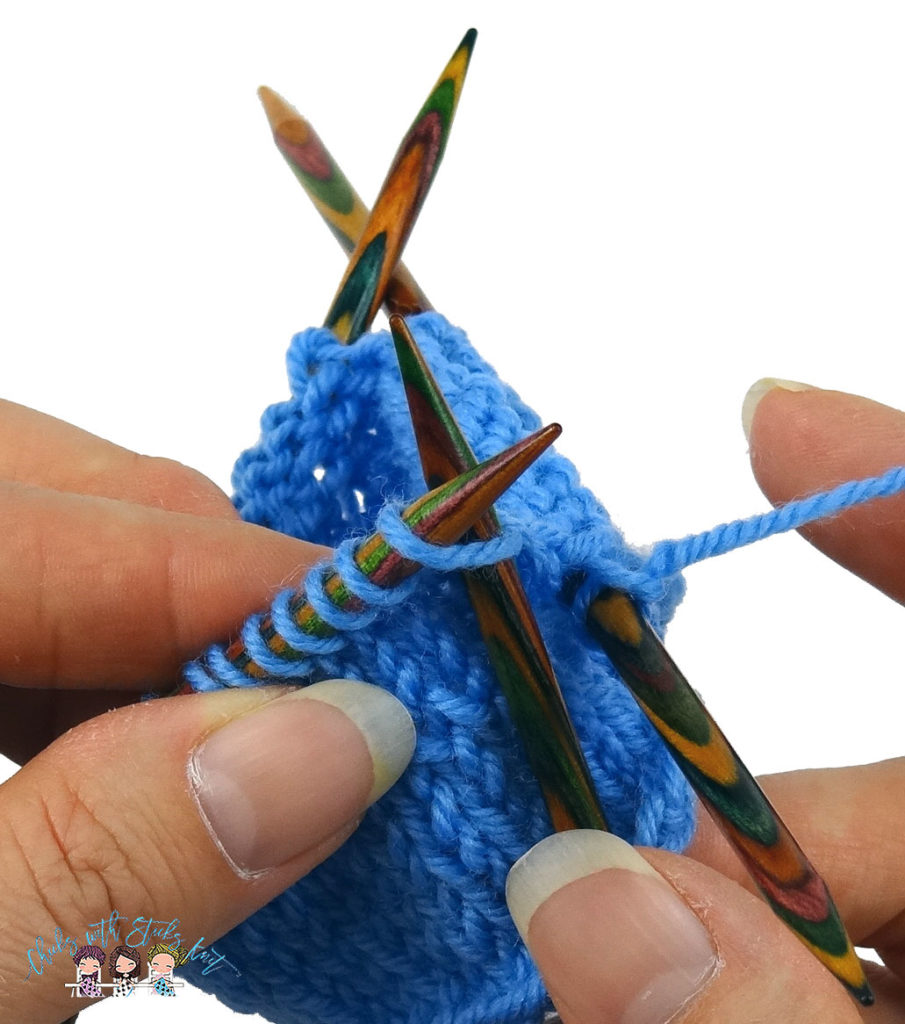
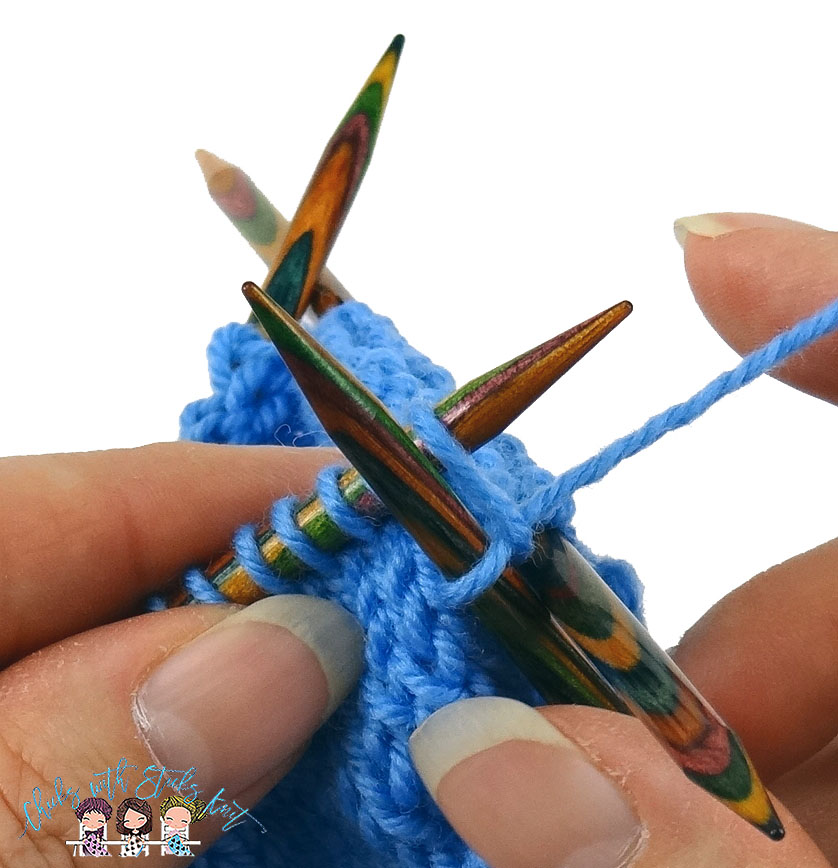
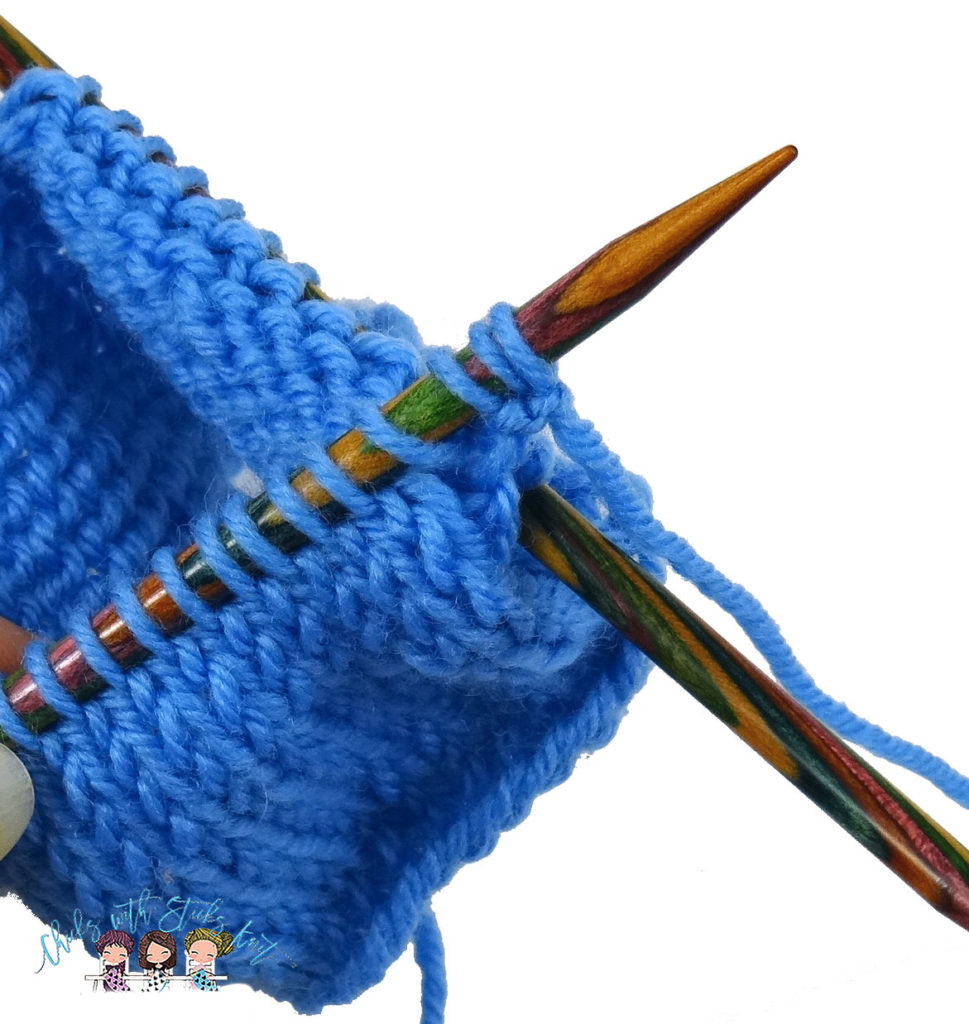
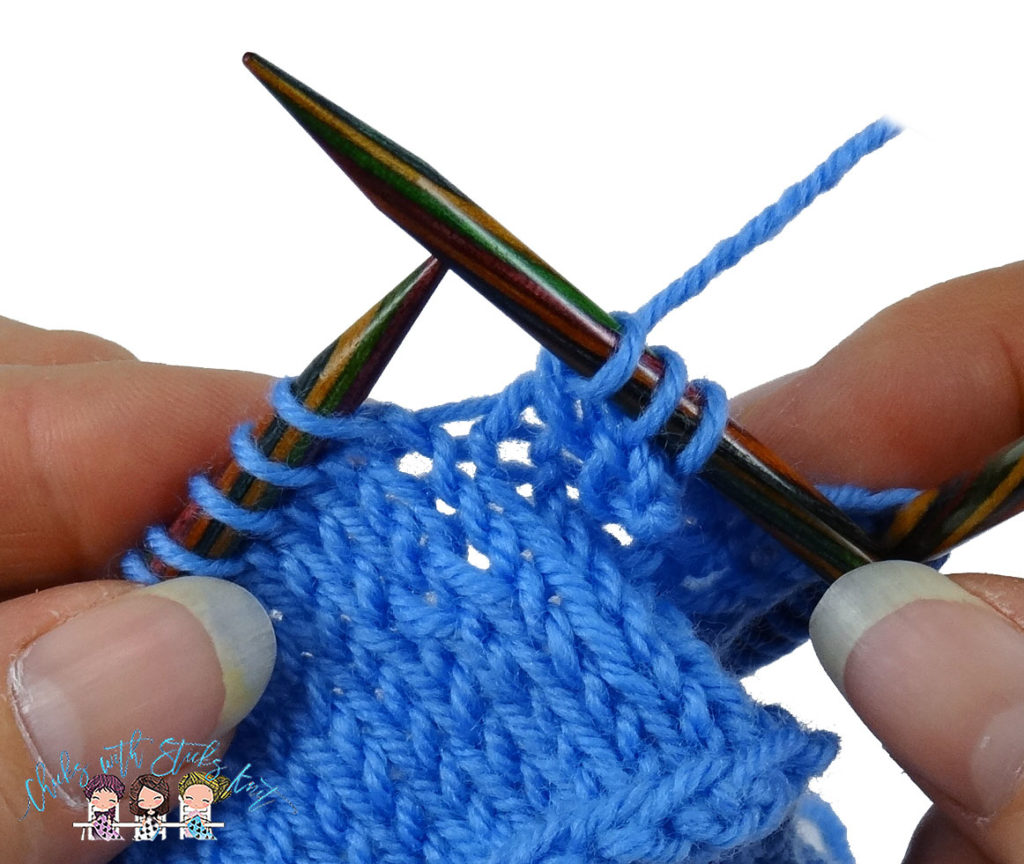
Step 3: Knit the next two stitches together through the back loop. This is the first knitted cast on stitch and the first stitch on the project. Insert the needle into the back of the two stitches. Wrap the yarn and draw it through. This will leave three stitches on the right hand needle.

Step 4: Slip the three stitches from your right needle onto the left-hand needle purlwise.
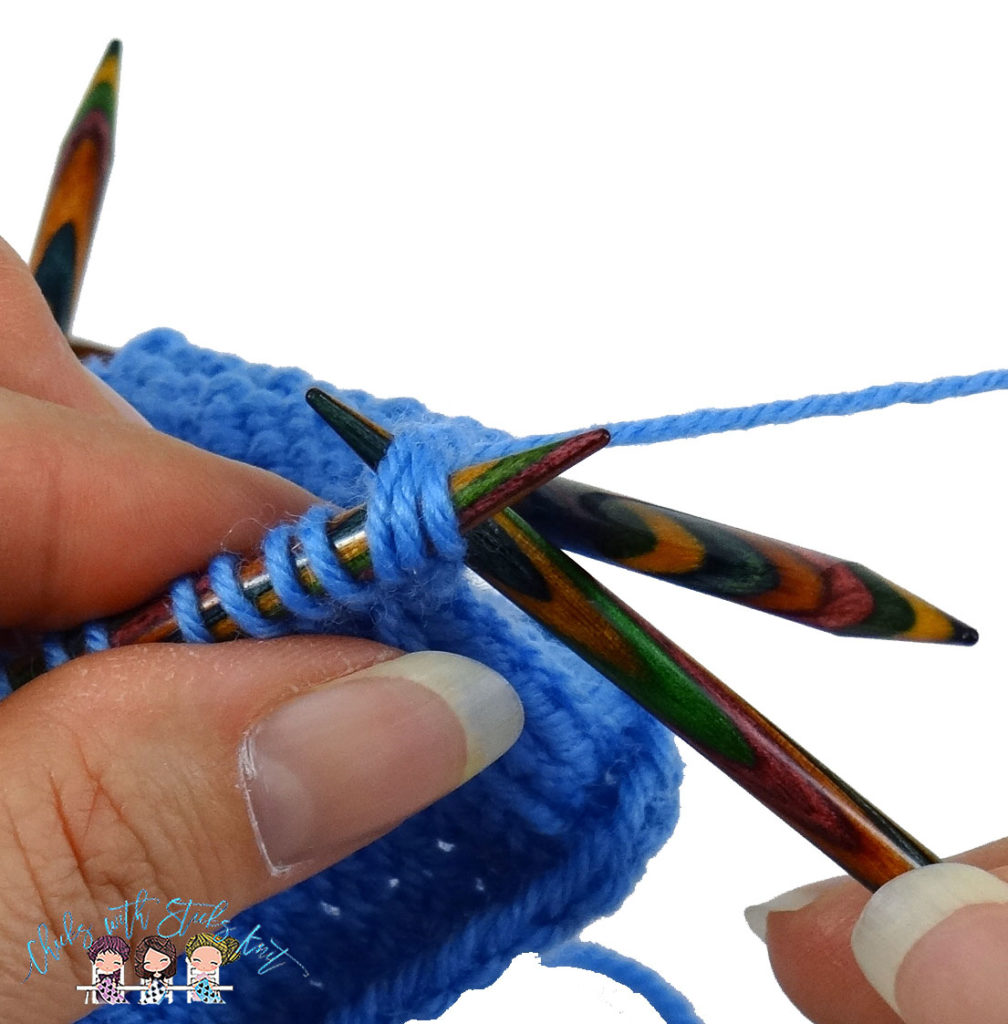
Step 5: Give the yarn a little tug and repeat steps 2-4 until all the stitches have been bound off.
Step 6: There should be three stitches left on your right-hand needle.
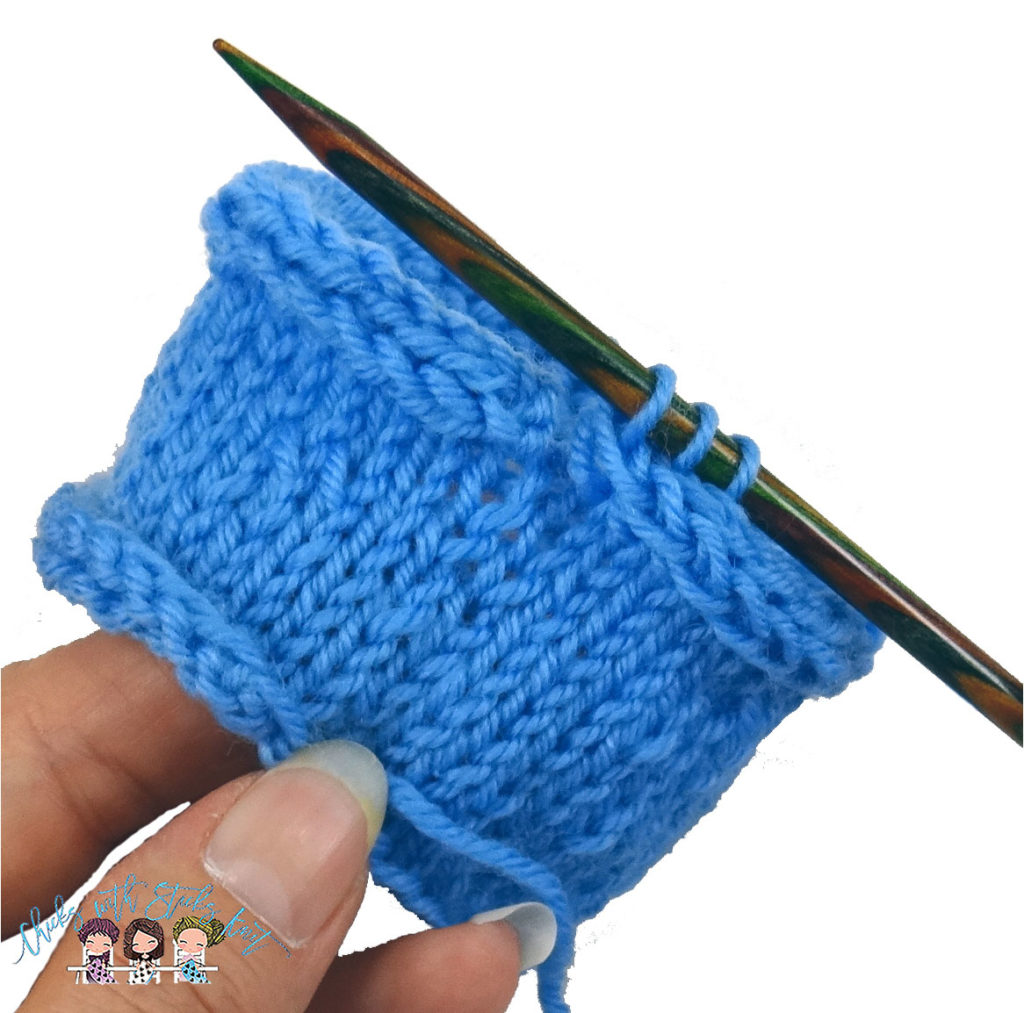
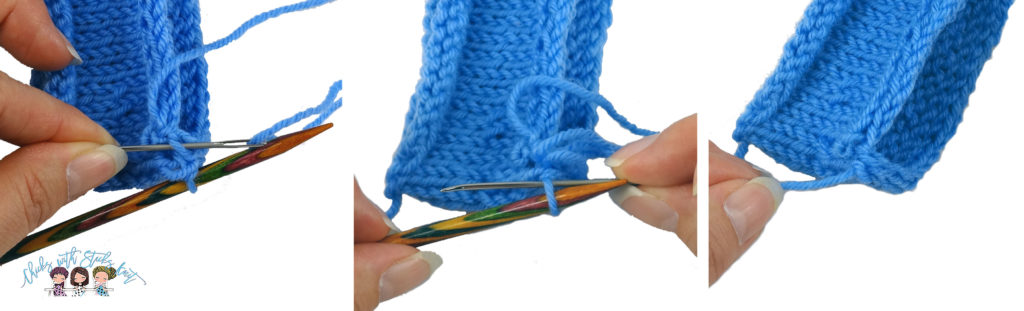
Step 7: Knitting in the round only: Leave the last three stitches on the needle. They can be grafted together with the beginning stitches in a similar way to the Kitchener Stitch.
a. Cut your yarn leaving about an 18-inch tail and thread the tail onto a tapestry needle.
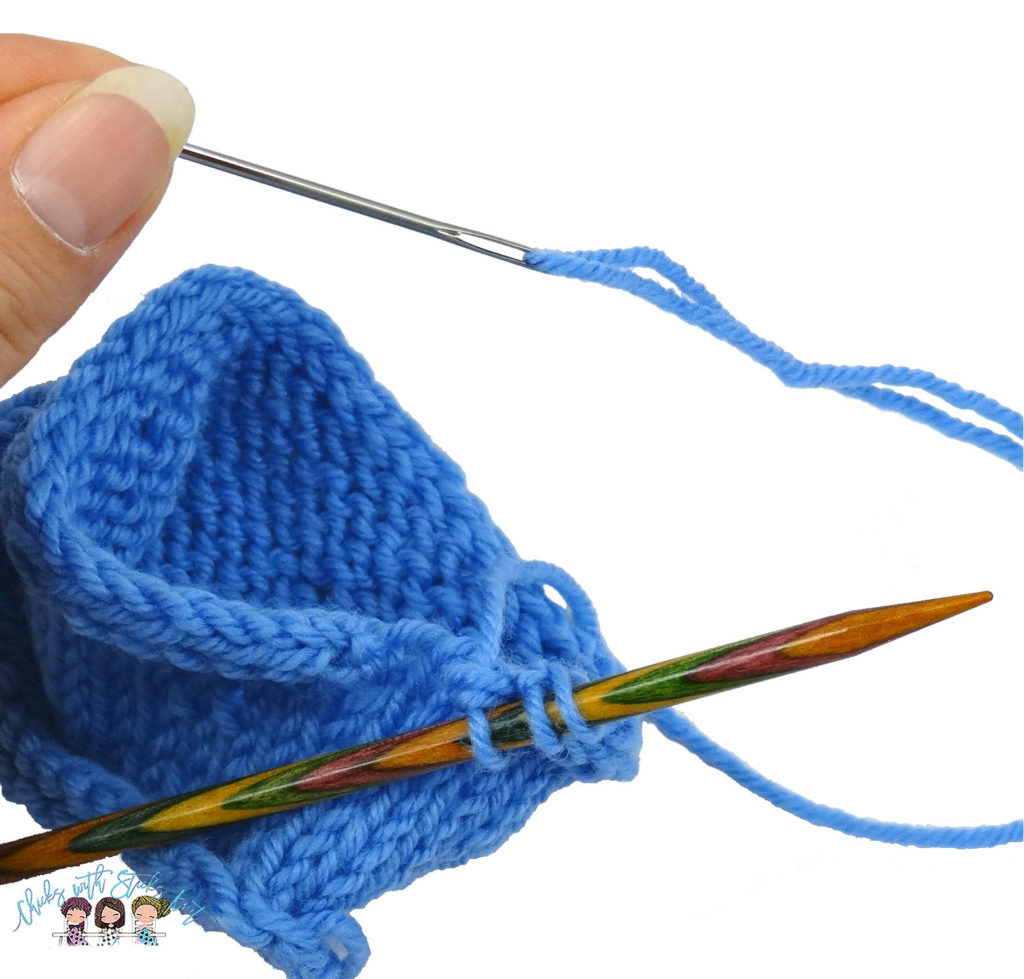
b. Insert the tapestry needle into the inside stitch on the needle and slip it off the needle and draw the yarn through.

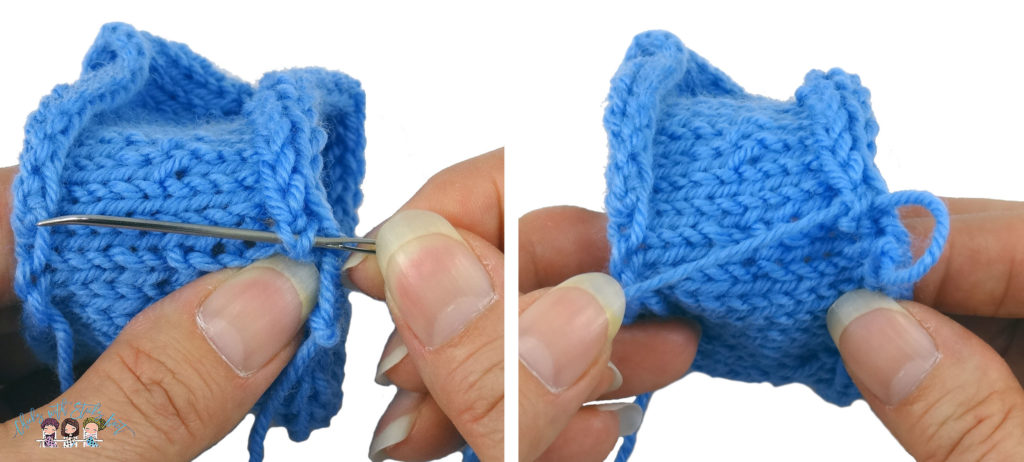
c. Insert the tapestry needle into the first V on the completed I-Cord from right to left and draw the yarn through.

d. Insert the tapestry needle into the left leg of the first stitch that was slipped off the needle and then into the next stitch on the needle and slip it off the needle and draw the yarn through.
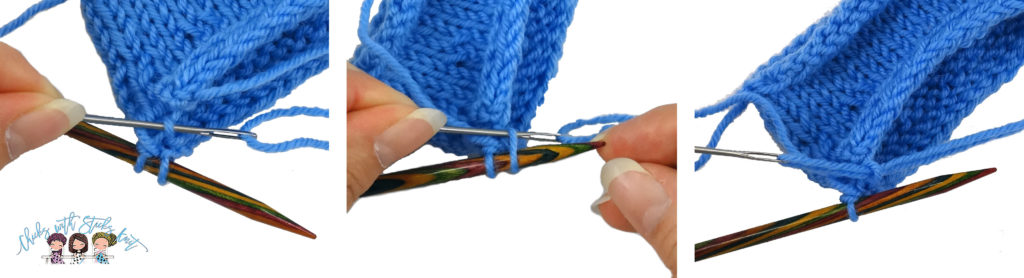
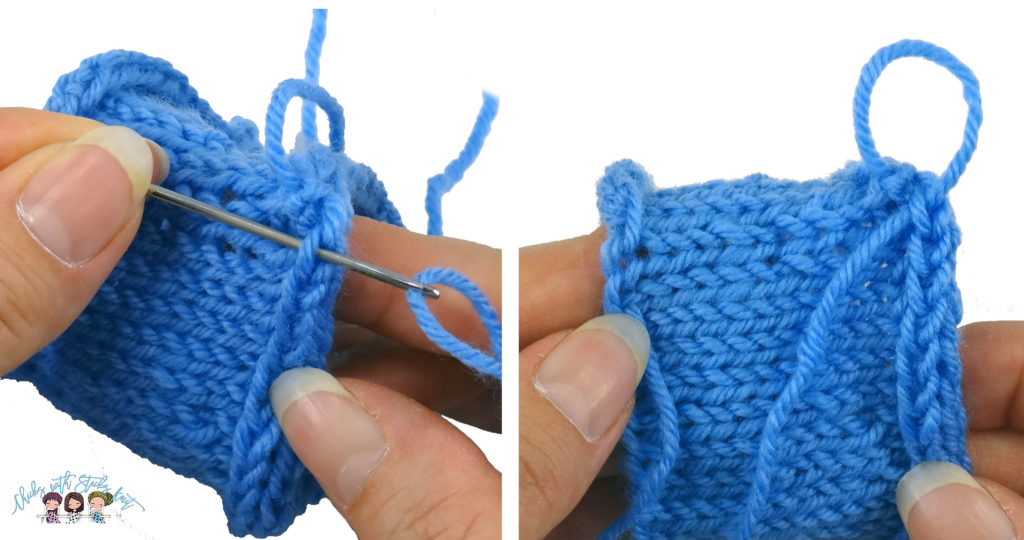
e. Insert the tapestry needle into the middle V on the completed I-Cord from right to left and draw the yarn through.

f. Insert the tapestry needle into the left leg of the second stitch that was slipped off the needle and then into the last stitch on the needle and slip it off the needle and draw the yarn through.
g. Insert the tapestry needle into the last V on the completed I-Cord from right to left and draw the yarn through.
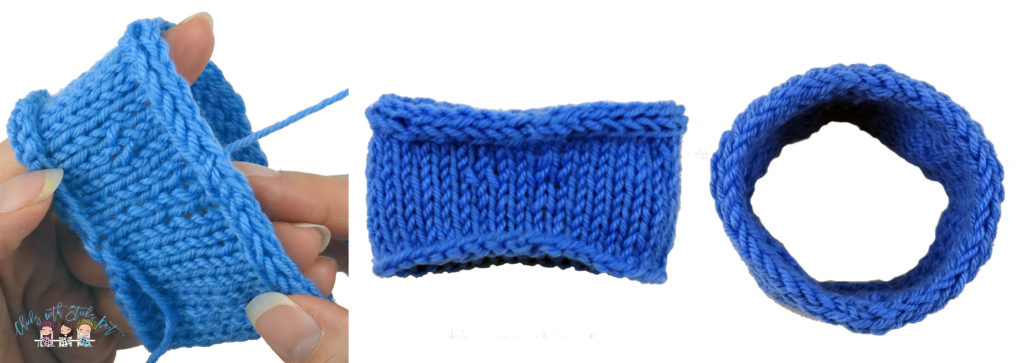
h. Insert the tapestry needle into the left leg of the third stitch that was slipped of the needle and draw the yarn through.
i. Then bring it to the back of the work to weave in your end.

Step 8: Knitting flat only: Slip the stitches back onto the left-hand needle. Bind off the three stitches as usual by knitting the first two stitches and lifting the first stitch up and over the top of the second stitch. Repeat for the last stitch remaining. Cut your yarn and pull it through the loop to secure.

It is easy to see why an I-cord bind off makes a perfect edge. It looks neat and is easy to perform. I know at first, when trying a new technique, it is hard to make the hands work the right way. Initially it feels like it won’t work, but by the end the repetition gets the fingers and the hands working smoothly. I encourage you to try some new techniques even when the pattern may not call for them. These are things that make your knitting original with your own personality. I hope you find the I-Cord Bind Off helpful. Let me know below, how you have used this technique!
Knit with Love my Friend,