How to do a Provisional Cast-On Without a Crochet Hook
The way I learned how to do a provisional cast-on was with a crochet hook and waste yarn; you can find that tutorial here. Recently, however, my friend, Bobbi, showed our knitting group how to do a provisional cast-on without the crochet hook. A provisional cast-on is used to hold the first row of stitches temporarily so that they can be knit later to add a border, do an I-cord edge, or work in the opposite direction. I have used a provisional cast-on for a shawl where both ends were finished with a beaded border. The whole shawl was knit including one of the end borders and then I went back and picked up the stitches on the other end and completed the same border. It creates a seamless way to continue in the opposite direction without having to pick up stitches, which would leave a ridge on the back of the work.
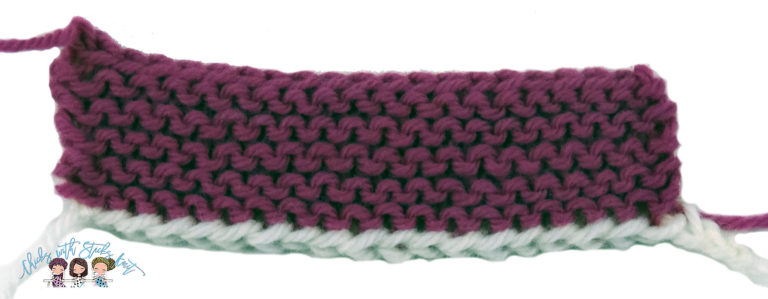
This provisional cast-on is done just like a long tail cast on except a second color (waste yarn) is attached and used as the tail of the yarn. When using waste yarn, it should be the same weight as your working yarn, smooth in texture and a different color. The most common mistake that is made when casting on is that the cast-on can be too tight. For tips on how to keep from casting on too tightly read my Long Tail Cast-On Tutorial. You can find it here. When casting on you want the stitches snug and not loose around the needle. However, when I use the word snug, I don’t mean tight or firm, I mean just touching the needle.
I will demonstrate how to do a Provisional Cast on without the crochet hook:
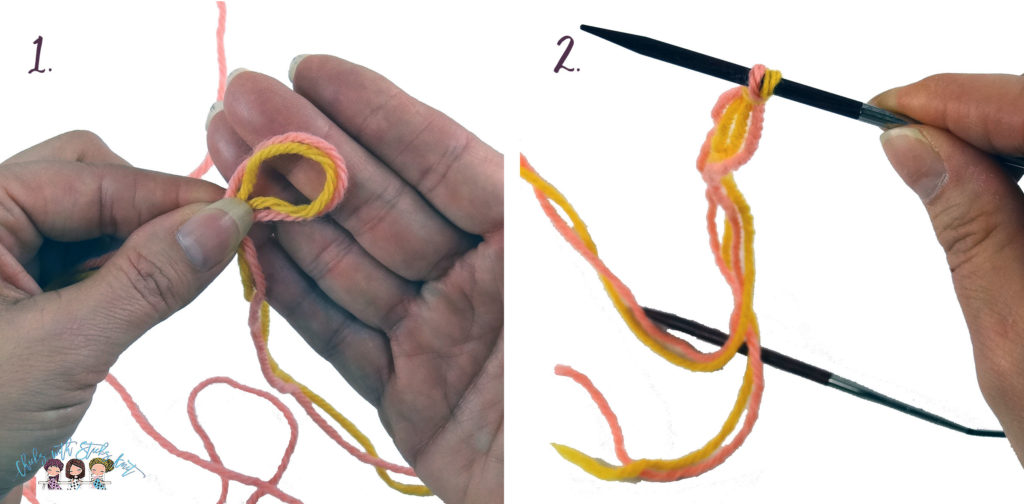
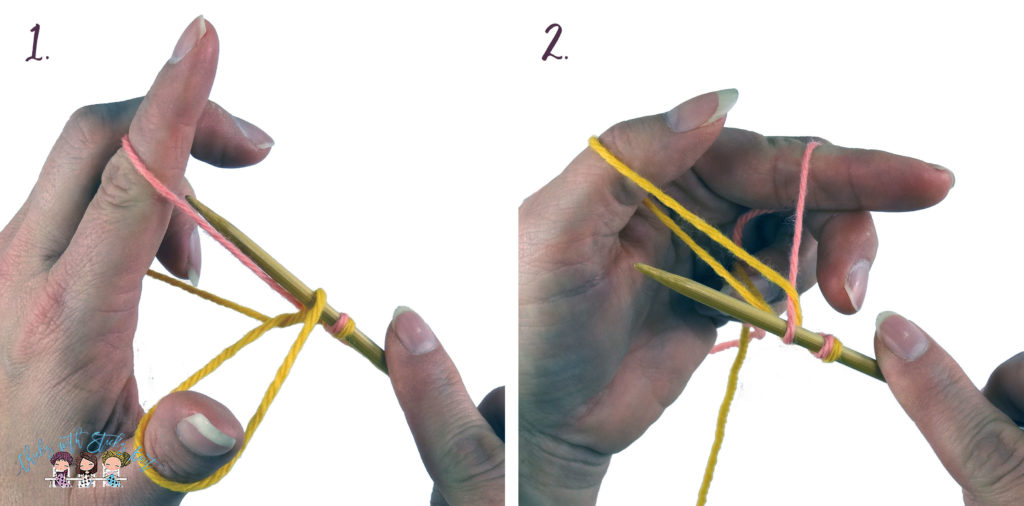
Step 1: Using the ‘waste yarn’ and the working yarn make a slip knot with both yarns held together. This will give you two loops in the slip knot. Place both loops of the knot on the needle with the waste yarn hanging to the front and the working yarn hanging to the back.
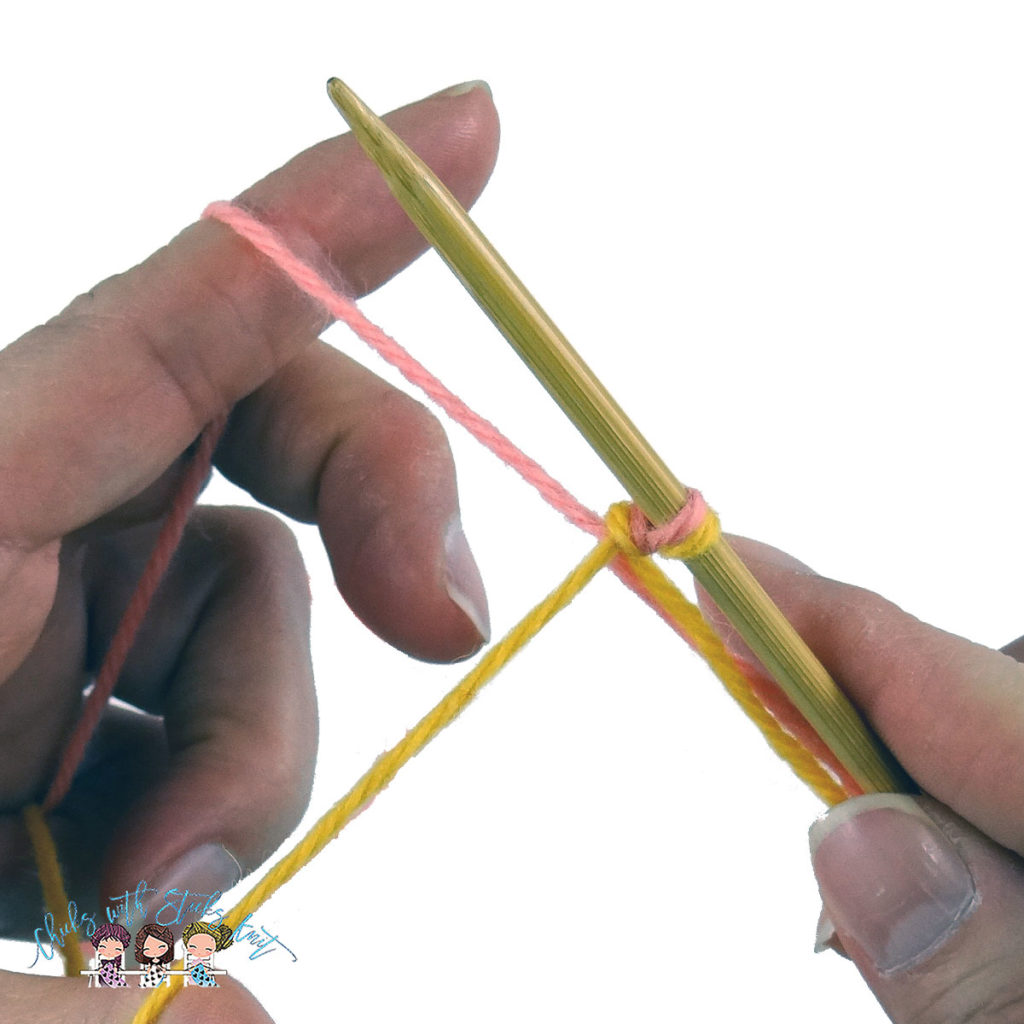
Step 2: Hold the needle in your right hand and use your left hand to create a slingshot with the yarn by placing the waste yarn over your thumb and the working yarn over your index finger. Pull your left hand down as if pulling the slingshot. This puts tension on the yarn. I hold the two tails in my pinky finger to keep them taut. Some people like to hold the two tails with all of their remaining three fingers.
Step 3: Using the knitting needle, catch the waste yarn around the thumb by going under and into the loop on the thumb.
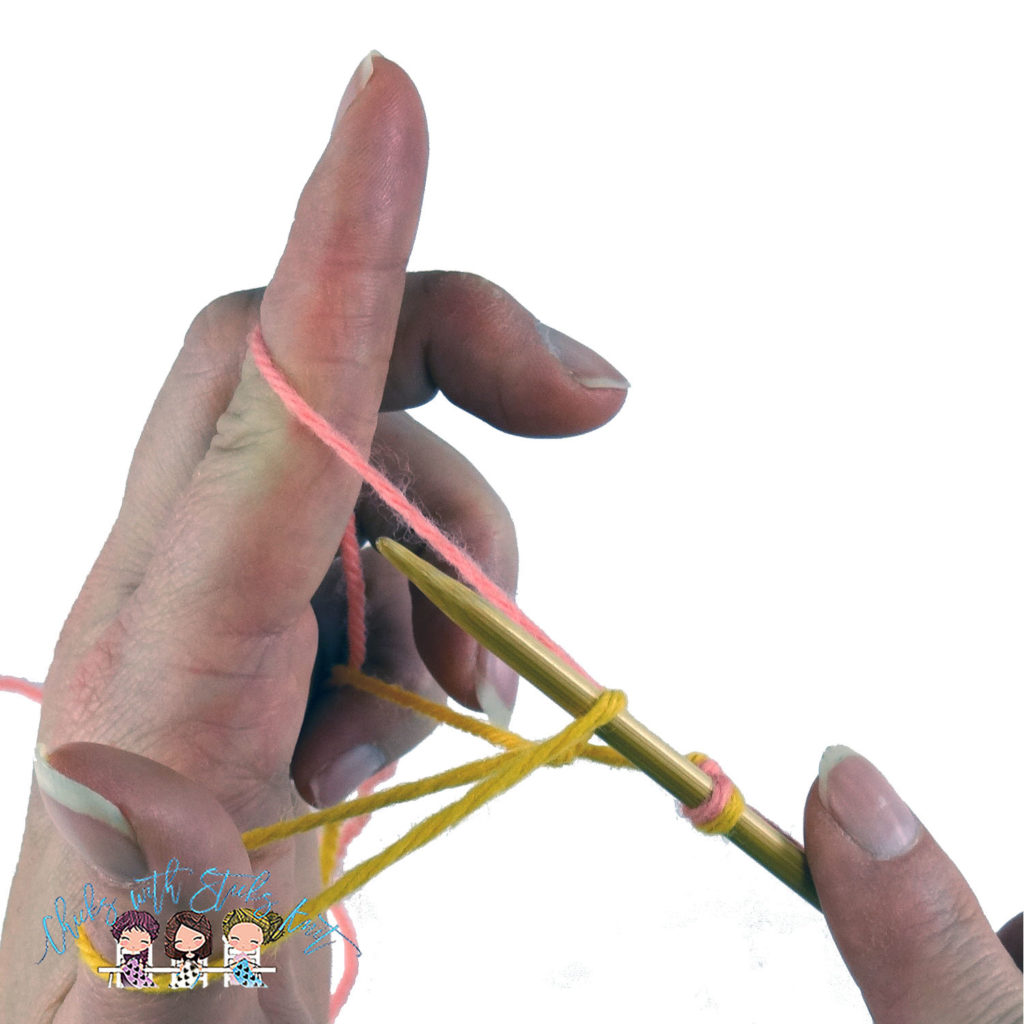
Step 4: Scoop the working yarn on the index finger by going over then under it and bring that loop through the thumb loop.
Step 5: Drop the loop of yarn off the thumb and pull the two tails to tighten the yarn on the needle (not too tight just snug).
Repeat steps 2-5 until the desired number of stitches are cast on. Do not count your original slip knot as a stitch. After casting on, if using circular needles push the slip knot end of the work to the far end of the needle. Drop the slip knot off the needle and pull it to release the knot. If you are working with straight needles you can drop the slip knot after you knit the first row, just be sure you don’t knit the slip knot. Cut the waste yarn, or the yarn you have used for the provisional cast-on, leaving a long tail so that it will not come undone as you knit.

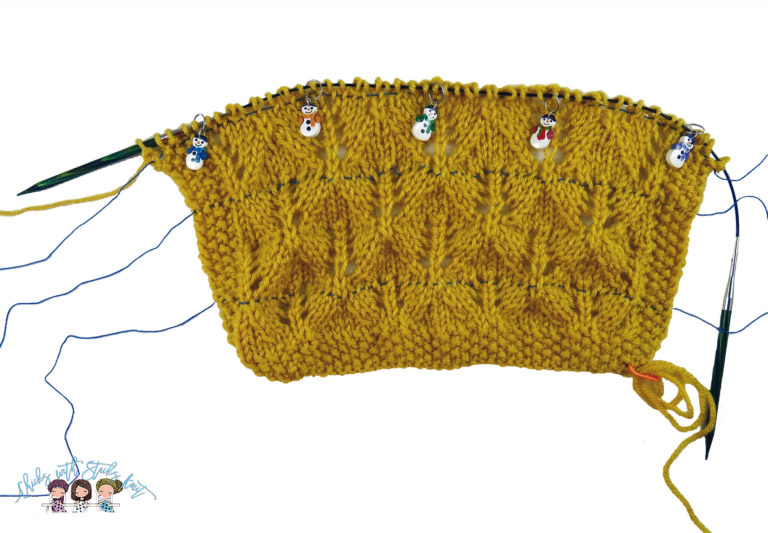
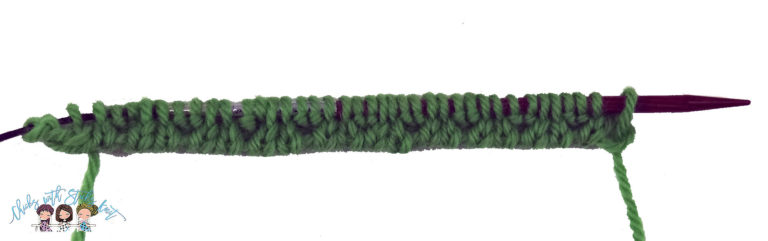
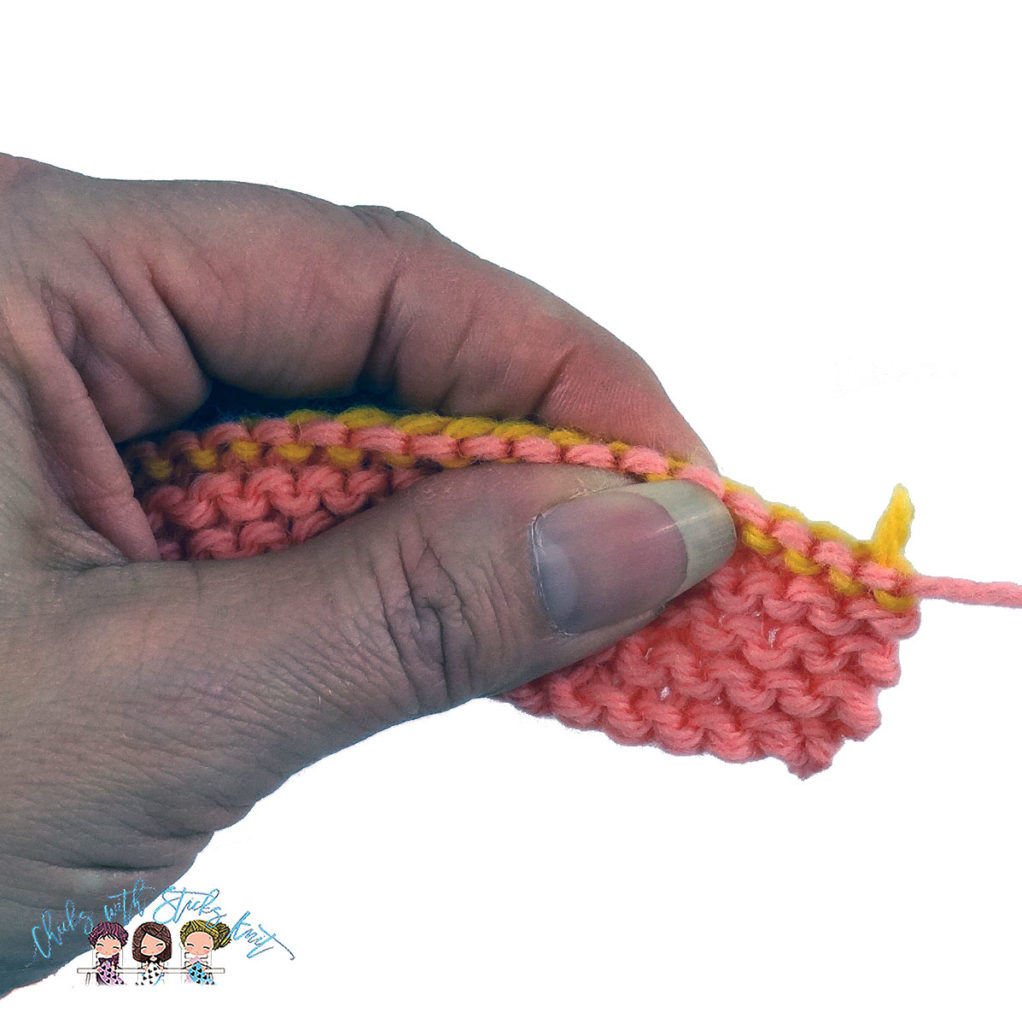
The working yarn will be looped around the needle while the waste yarn will be on the edge along the bottom of the needle. This will be counted as your first row of knitting. I recommend placing a lifeline in this row before doing anything else. Instructions on how to place a lifeline in your work can be found here. Proceed to row two in your pattern.

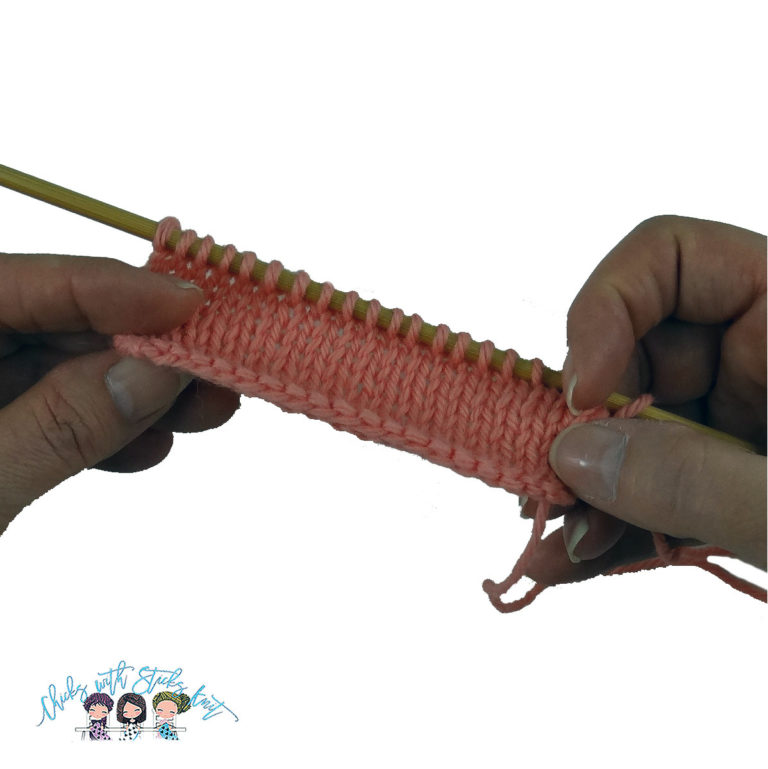
After knitting the project the pattern will instruct you to return to the cast-on end to finish the pattern. The temporarily held stitches need to be placed on a needle to be worked. It can sometimes be helpful to use a needle one size smaller when placing the stitches back on the needle but be sure to switch it to the correct size before you start knitting.
How to place the stitches back on the needle:
To place the stitches back on the needle, start at the end where the slip knot was removed. This is the end where both the working yarn and the waste yarn have a tail hanging. Cut the waste yarn so that the tail is short.
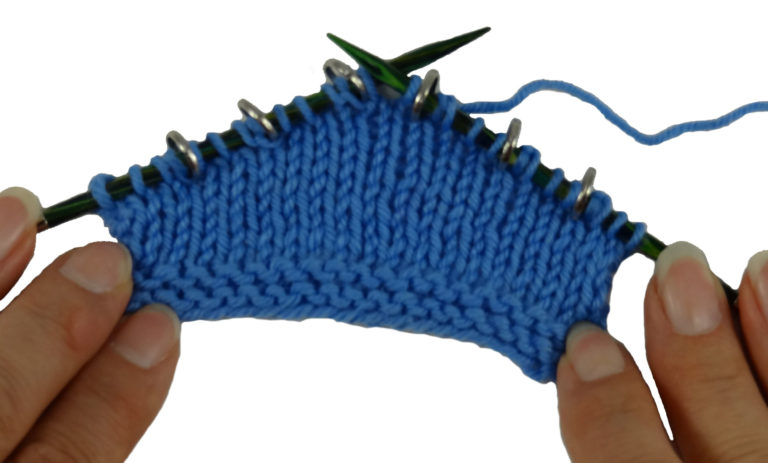
Place the needle into the first stitch from back to front, then pick the waste yarn out of the stitch that is on the needle. I find it helpful to use a tapestry needle to help pick the waste yarn out. As you remove more waste yarn you may like to cut it short again so that there is less yarn to pull through the stitches. Continue placing the stitches on the needle and picking the ‘waste yarn’ out until you have all the stitches on the needle.
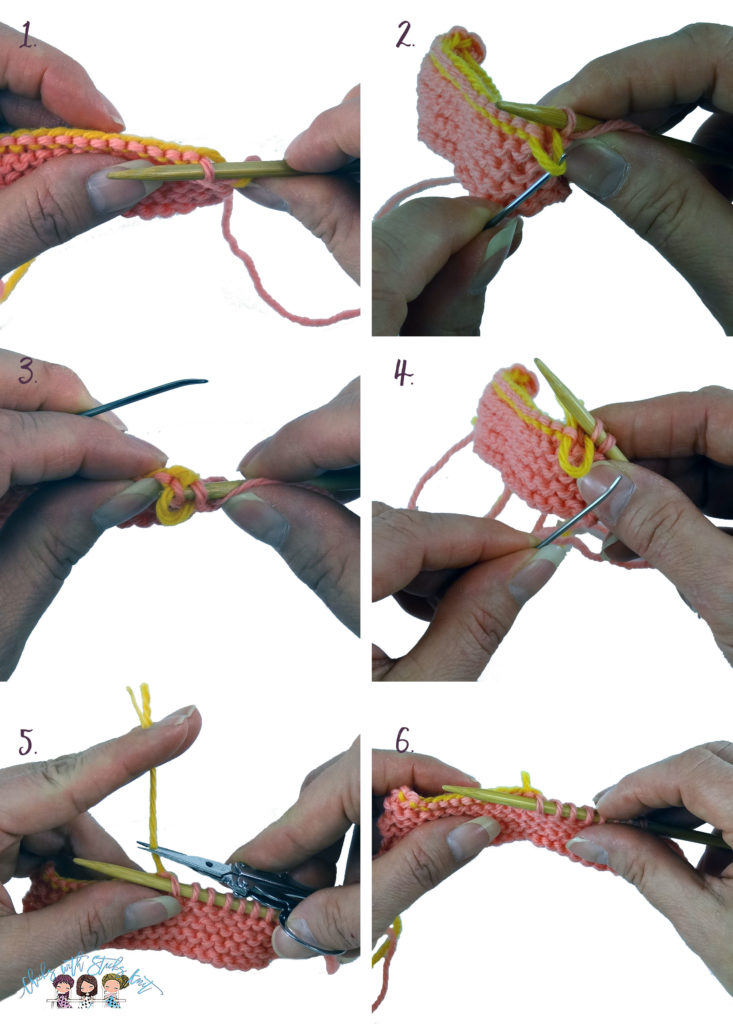
The very last stitch will not look the same as the other stitches and will actually be in the row above. However, you will see one last stitch that has waste yarn in it. Place this stitch on the needle and pull the waste yarn out. You should have exactly the same number of stitches on the needle as you cast on. You can now begin knitting in the opposite direction as the pattern calls for.
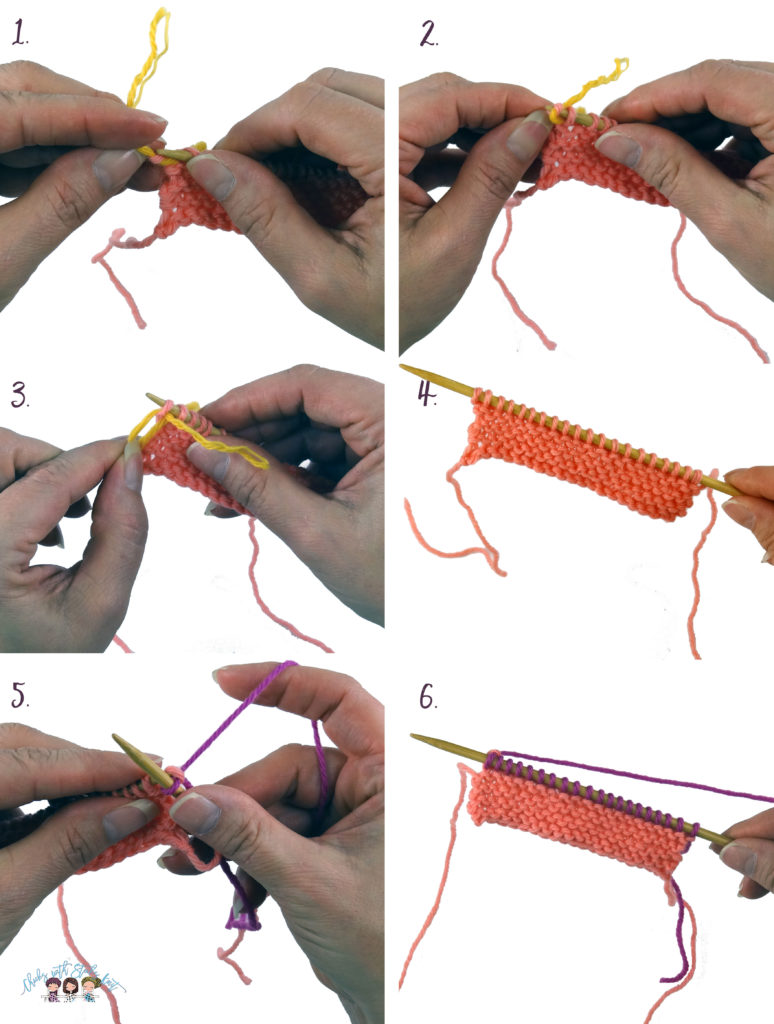
I encourage you to try both methods of the provisional cast-on, the one that requires a crochet hook and this one without it, to see which one you like better. I think that putting the stitches back on the needle is a little bit easier with the crochet hook method, but that is just my personal preference. Some of my students have a really hard time holding the crochet hook so having this option is much easier for them. Let me know which method you like best and what projects you have knitted with a provisional cast-on.
Knit with Love my Friend,